

Find Your Exact Genre, Find Your Lifelong Book Ambassadors by Shayla Raquel
This blog post was written by a human.Hi readers and writerly friends!
If you’re a returning reader, welcome back and if you’re new here, thanks for stopping by! For this post, fellow Oklahoma Freelance Editor Shayla Raquel is taking over the blog to tell you all about how to not only grow your audience but how to transform readers into lifelong ambassadors of your book! This post shows you exactly how to gain a clear understanding of your genre and target audience to grow an enduring, loyal readership! Be sure to leave her a comment and check out her website and other socials!
A best-selling author and public speaker, Shayla Raquel teaches people the ins and outs of writing, publishing, and marketing their books. Her in-person and online classes focus on author branding, self-publishing, book marketing, and the craft of writing.
She is the author of the Pre-Publishing Checklist, “The Rotting” (in Shivers in the Night), The Suicide Tree, The 10 Commandments of Author Branding, All the Things I Should’ve Told You, and “Savage Indulgence.”
In her not-so-free time, she studies all things true crime and obsesses over squirrels. She lives in Oklahoma with her husband and three fur babies.
More recently, Shayla has served as the founder of an incredible non-profit organization based in McLoud, Oklahoma, called Crime & Compassion Inc., through which she helps incarcerated women find their voices and share their stories with the world through their writing.

Shayla Raquel, best-selling author, public speaker, and book editor.
Why Do I Need To Know My Target Audience?
Investing time and money into social media, email newsletters, Amazon ads, podcast interviews, and blog posts will net you very little ROI if you do not know your precise genre.
Because if you don’t know exactly what book you wrote, then, my friend, you don’t know your audience.
And if you don’t know your audience, what good is all that time and money you’ve put toward marketing your book?
My goal today is to teach you how to determine your exact genre as a novelist so you can pinpoint your target audience. Once you do that, you can have lifelong book ambassadors: people who fangirl over your book and tell the world about it.

Amazon Kindle Categories. Photo by Shayla Raquel.
So, What Is Your Genre?
If I ask an author, “What book is your genre?” and they reply “Fantasy,” I get a little worried.
Go to Amazon.com and toggle the search bar from All Departments to Kindle Store. On the left-hand side of your screen, select Kindle eBooks. (We don’t need the newsstand or singles or anything like that.)
Next, select Categories. It’s easy to miss sometimes because Amazon doesn’t make it prominent, but it’s usually under the search bar or off to the left-hand side.
Next, for this purpose, select Science Fiction & Fantasy. Narrow it down once more by selecting Fantasy. There are over 50,000 e-books in the Fantasy category alone. That’s a lot of competition.
Now you have to determine where your novel fits in the world of fantasy. Before I explain, I have a very important note: I desperately wish authors would do this exercise before writing their novels. If they did, then they’d ensure their story fit within the expected storylines of, let’s say, Gaslamp Fantasy or Arthurian Fantasy.

Next, select Fantasy. Photo by Shayla Raquel.
My point: Your novel will be difficult to sell if you wrote it without knowing its genre. You can figure it out, but it’s a little bit tougher because there’s a chance there are several genres packed into one story. (I did this with my first novel, so don’t be like Shayla!)
Okay, now that you have a warning to heed, let’s move on to subgenres.
So here you are in the Fantasy genre for Kindle e-books with all this competition. Where does your book fit? If your subgenre is Action & Adventure, that’s more specific than just saying Fantasy, but could you niche it down even more by mentioning the types of characters? (Amazon gives us a handy checklist for various genres.) If you have Elves or Fae, that officially means you’re only competing with 1,000 e-books now!
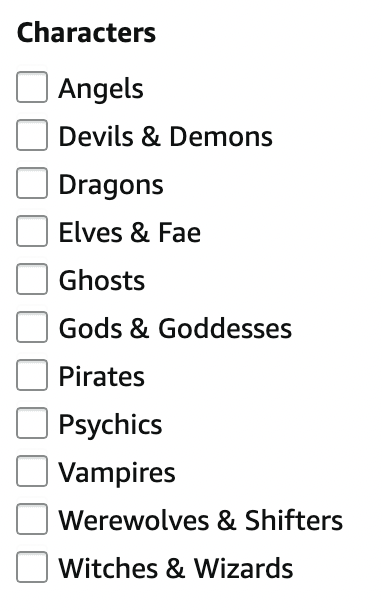
Elves. Photo by Shayla Raquel.
Your genre would be, let’s say, Fae Action & Adventure Fantasy.
Let’s shift to Mystery, Thriller & Suspense. If you’re going to find your niche, I suggest looking into Moods & Themes (another handy checklist). If I write Crime Fiction (50,000 e-books in this genre), I have several subgenres within that too:
Heist
Kidnapping
Murder
Noir
Organized Crime
Serial Killers
Vigilante Justice

Crime Fiction. Photo by Shayla Raquel.
But I have the opportunity to get super specific by selecting a mood or theme, such as Action-Packed. Therefore, it would be: Action-Packed Heist Crime Fiction.

Action Packed. Photo by Shayla Raquel.
It gets better! I can also look into Settings (beaches, islands, mountains, etc.) and Characters (amateur sleuths, British detectives, gay protagonists, etc.) on the Amazon checklist.

Setting. Photo by Shayla Raquel.

Characters. Photo by Shayla Raquel.
If your story has some love in it, you would go to the Romance category and narrow it down to, maybe, Time Travel. On the left-hand side, take a look at Romantic Heroes and Romantic Themes (originally called Tropes). By narrowing the genre down to Viking Time Travel Romance, I have certainly found a very specific group of readers!

Vikings. Photo by Shayla Raquel.
Now What?
Now that you know some tricks for finding your exact genre, you have a foundation for marketing your book to the right audience. And marketing it well.
But how do you get book ambassadors to see your book?
It depends on the platform, of course. If you label your categories and keywords properly through Amazon KDP and Amazon Author Central, you’ve just made your life way easier. (To learn how to request 8 additional categories and how to find keywords, read 5 Freakishly Helpful Amazon Tricks Every Author Should Use.)
Outside of Amazon, your blurb (back cover copy and Amazon product description) must reflect your genre. In addition to a steller book cover, a blurb helps sell your book. It’s your big flashy billboard: it’s meant to suck the reader right in.
When writing a blurb, follow these steps:
Drop the Hook — A hook is meant to entice the reader to bite. I love this hook from The Martian by Andy Weir: “Six days ago, astronaut Mark Watney became one of the first people to walk on Mars. Now, he’s sure he’ll be the first person to die there.”
Dangle the Characters — Reel them in with intriguing characters.
Dive into Conflict — Show them what this book is all about. What’s the plot? Why should the reader buy this book?
Determine the Consequences — What hangs in the balance for your characters? Formula: Conflict (“Character must do this”) + Stakes (“Or this will happen”) = Consequences.
Dine on the Big Question — End your blurb on an intriguing question or a point of tension—something that will convince the reader to take a chance on buying your book.
For the complete how-to, read Writing Compelling Book Blurbs.
If you’ve got these things down (genre, Amazon, and blurb), you need to spend quality time putting your book in front of people on various platforms to determine where you get the most bites (from readers who want to chow down on your genre). It could be through any one of these avenues:
Social media (especially TikTok)
Email newsletter (your own)
Podcasts (interviews specifically)
Book promotion newsletters (Book Gorilla, Many Books, Book Rebel, etc.)
Amazon ads
Social media ads
Book reviewers (YouTube, Instagram, and TikTok are full of reviewers)
Blogs
Some platforms work better than others for a variety of reasons, but you won’t know until you try and stay committed long enough to determine if it’s worth the ROI. If you write sexy stories, there is a community with 4.2 billion views on TikTok called SmutTok just waiting for you. If you want your book to be reviewed, there are loads of BookTubers on YouTube ready and willing to geek out over your book.
If you will do the hard work of determining exactly what you write, it will be smoother sailing when it’s time to find your readers.
Best of luck!
Thanks for reading Shayla’s guest blog post! I hope you enjoyed it and found her advice useful and actionable! If you liked this post, please leave us a comment below and don’t forget to check out the other posts on the blog!
Bibliography
Raquel, Shayla. “Find Your Exact Genre, Find Your Lifelong Book Ambassadors.” Blog Post article and photos, February 3, 2023.furkanfdemir. “Classic wooden shelves with assorted books in store” (Thumbnail photo). Pexels photo, December 28, 2020.
Further Reading
“Writing Compelling Blurbs: Book Descriptions to Entice Your Reader.” by Shayla Raquel, June 28, 2022.“How Not to Launch a Self-Published Book: 7 Easy Steps for Indie Authors.” by Shayla Raquel, October 18, 2022.“Bad Book Marketing: Three Things Authors Need to Stop Doing Immediately.” by Shayla Raquel, March 20, 2022.“5 Freakishly Helpful Amazon Tricks Every Author Should Use (2022).” by Shayla Raquel, January 17, 2022.Or you can just check out all of Shayla’s blog posts about book marketing here!Crime & Compassion Inc.—Literature written by those who were written off—a 501(c)(3) registered nonprofit in Oklahoma.
More Like This
8 Reasons Why Having A Creative Community MattersThe Importance of Befriending Your Competition20 Tips and Tricks for a Successful Email NewsletterBook Marketing 101: Everything Writers Need To Know About Literary Agents and QueryingSee all Marketing blog posts.
Related Topics
8 Ways To Level Up Your Workspace And Elevate Your ProductivityYoga For Writers: A 30-Minute Routine To Do Between Writing SessionsHow To Overcome Writer’s BlockWriting Every Day: What Writing As A Journalist Taught Me About Deadlines & DisciplineWhy Fanfiction is Great Writing Practice and How It Can Teach Writers to Write WellCheck out my other Writing Advice blog posts!
Before You Go
Looking for your next read? I've got you covered. See my Reading Recommendations and Reading Challenges for ideas about what to read next!Oh, and don't forget to Get Your FREE Story Binder Printables e-Book!
Recent Blog Posts


This blog post was researched, written, and published by a human author without the assistance of generative artificial intelligence (gen-AI). Gen-AI models are trained on text written by humans, therefore, the presence of specific punctuation, verbiage, tone, or predictable, marketing-style phrases alone are not sufficient indicators of gen-AI usage. I implore readers to use context clues, critical thinking, pattern recognition, research, and employ their best judgement when determining the validity of human authorship of print and digital media today. If you want to learn more about my stance on gen-AI and it’s role in media and the publishing industry, I plan to release a blog post on this topic very soon, so stay tuned for that. This disclaimer will be updated once that post goes live. In the meantime, I will continue to be transparent about which tools and resources I use in my work.

15 Misconceptions About Freelancing
Freelancing is often surrounded by misconceptions that can mislead those considering this career path. One common myth is that freelancers lack job security; however, many freelancers build stable careers by diversifying their client base and continuously marketing their services. Another misconception is that freelancers earn less than traditionally employed individuals; in reality, many freelancers match or exceed their previous salaries, especially as they gain experience and specialize in high-demand niches. Additionally, the belief that freelancers have no bosses is misleading, as they must answer to clients and adhere to project requirements and deadlines. The notion that freelancing is less legitimate than traditional employment is unfounded, as freelancers are recognized as independent contractors and contribute significantly to the economy. Finally, while some assume freelancers are socially isolated, many actively engage in networking, collaborate with clients, and participate in professional communities, maintaining robust social interactions. By understanding these misconceptions, freelancers, their clients, and everyone else can glimpse a clearer picture of what it’s like working independently.
This blog post was written by a human.Hi readers and writerly friends!
If you’re a returning reader, welcome back and if you’re new to the blog, thanks for stopping by! In this post, we’ll discuss fifteen misconceptions about freelancers (writers, editors, artists, entrepreneurs, and content creators). There’s a lot of stigma surrounding freelancing and the instability of working for oneself. Many people who aren’t freelancers or entrepreneurs have misconceptions about freelancing and I’m here to debunk them!
Many of the misconceptions surrounding freelancing are based in ignorance and I can understand how people looking from the outside in may have these ideas about freelance work. While some of these may be true for a portion of the freelancer population, they’re certainly not true for the majority. Every freelancing business is unique and comes with its own set of challenges. What makes some of these misconceptions truths and some of them myths is how freelancers handle those challenges.
This is not a complete list, but some of these misconceptions and myths about freelancing include:
You own your own business
You don’t have a boss
You can work whenever, wherever, (and however) you want
You only have to work on projects you like
Freelance work is always exciting
Freelancers make more money for less work
Freelancers make less money
There’s no job security
As a freelancer, you don’t have employee benefits
Freelancing is more stressful than a full-time job
Freelancers should work for free
Freelancing isn’t 100% legit
Freelancing hurts real businesses
All freelancers want to get a “regular job”
Freelancers are socially awkward
You don’t have to be a boss to be your own boss
While this is true for many freelancers, it’s not necessarily true for all of them. Many freelancers are employed by other entrepreneurs and still have to report to a boss.Even if you’re a freelancer, running your own small business from home, you still have to answer to clients and colleagues whom you work with. As a freelancer, your boss is the client.
You can work whenever, wherever (and however) you want / you only have to work on projects you like/ freelance work is always fun

Freelance workstation in a coffee shop. Photo by Toa Heftiba.
Many successful freelancers have the freedom to pick and choose to some degree, the projects they agree to work on. However, when work gets low, and clients are sparse, the pressure to agree to whatever work comes your way is higher than ever. As someone working for themselves, freelancers typically have to work harder to deliver a quality product. However, it is true, to some degree, that freelancers can work where they please. As long as they’re working for themselves or if they have a lenient boss, they can work from home, a library, a coffee shop, or from the park; they just need a place where they can focus on their work and avoid distractions.
Likewise, freelance work is not always enjoyable or exciting. Freelance work can be tedious and grueling some days and often consists of administrative work and accounting. As mentioned in the next misconceptions below, many freelancers who are just starting out often have to take what they can get, and this means they can’t afford to be picky about jobs. As a result, a lot of novice freelancers end up taking hard or boring jobs to make ends meet and build out their portfolio for hopefully better-paying, more interesting jobs in the future.
Freelancers make less money and/or do less work
Many freelancers charge less than the larger companies they compete with to give themselves an edge. Many other freelancers charge within industry standard and offer sample services to demonstrate their skills and quality of work. Many other freelancers charge above industry standard because their skills and services are worth the expense and they have the credentials and testimonials to back it up. Freelance pay depends on your field and how in-demand your skills/services are. Starting out, you may have to build a reputation and possibly accept lower paying jobs to build a strong work history. Testimonials, reviews, and referrals are excellent ways to boost client confidence in your abilities.
There’s no job security for freelancers
While freelance jobs are known for instability or unpredictability, the idea that there is no job security in freelance work, is just false. It depends on what you consider job security and what level of security you’re looking for.
It can be argued that standard day jobs don’t have job security, because if you’re an employee working for just one company or organization, you could be fired, losing your only source of income. However, if you’re freelancing, and you’ve got a few different clients, losing one at a time, would not cost you your only income. Replacing a single client can be much easier than finding another full-time job. It seems finding clients is somewhat less competitive than applying for a job to which many other people are also applying.
Freelancers get zero company benefits
The more savvy freelancers just might surprise you with this one. A freelancer might not have a traditional 401K but that doesn’t mean they don’t have great health care and long-term savings. Many freelancers also have the privilege to take longer vacations and more often. They often have just as many or more sick days at their disposal than typical employees and they can pick and choose their insurance benefits from a wide array of companies, rather than having to enroll in just what their employer provides.

Freelancers clutching her head in stress. Photo by Elisa Ventur.
Freelancing is more stressful than a typical 9-5
For some freelancers this is true. As mentioned above, freelancers who are just starting out may have to settle for challenging or boring/tedious jobs in order to cover their bases. And many seasoned freelancers still struggle with stress due to other factors such as family and lack of time management. However, many freelancers have figured out how to manage time, stress, focus, finances, and work-life balance which translates into lower-stress positions with more pros than cons. I think this one specifically is influenced by 1) the field and demand of services/skills and 2) the freelancer’s approach to work.
Freelancers should work for free / freelancing isn’t real work
Yeah, right! Try telling that to the IRS! Freelancers are considered independent contractors and they are generally required complete a 1099-MISC or similar form for taxes. And freelancers often work long hours and produce thoughtful, quality work as a result and should certainly be paid for their services. Freelancers not delivering on their end of the bargain should be confronted and asked to rectify this. One way to avoid this is to provide sample work, testimonials, referrals, and reviews to demonstrate skills and services.
Freelancing hurts real businesses
You might be surprised to hear that the opposite is true, actually. Often, small companies that cannot afford to hire full time employees may rely on contracted work to keep their business running. They may sometimes collaborate with other freelancers to meet their needs on a budget too. Freelancing does not hurt businesses; it stimulates the economy and allows more consumers to participate in the free market. Freelancers also give the market alternative options to large corporations with a large price tag.
Freelancers have multiple jobs or have to supplement their income
While many people do freelance work to supplement their income, there are also many freelancers whose first picks would be freelancing because of the benefits and freedom it provides. Freelancing is especially appealing to the millennial generation, who are less productivity-focused and more meaningful-work -focused, non-traditional families, and entrepreneurs.

Freelancers meeting at a coffee shop. Photo by Brooke Cagle.
Freelancers are socially awkward
Another common misconception about freelancers is that they are socially awkward, are hermits, antisocial, or loners. While many freelancers prefer solitary work (for many different reasons including creative control, time management, and freedom,) many work alone simply due to the nature of freelance work. Some freelancers collaborate with other freelancers which helps them network and build connections with others in their field and related fields. Others don’t mind working alone and find they are able to focus better when not working as part of a team.
Freelancing isn’t for everyone and it's certainly not always easy or high paying. Learning the ropes, practicing and honing skills, building a portfolio and client base, networking, and working from the ground up is arguably more challenging, more daunting, and more physically, emotionally, and mentally taxing than just showing up to a 9-5. However, freelance work can be incredibly rewarding and fulfilling and it gives entrepreneurs the ability to make an impact on the world, and to enjoy what they’re doing.
That’s it for my list of 15 Misconceptions About Freelancing! Have you heard any of these misconceptions? Do you think they’re true? Why or why not? What are the misconceptions you have heard that aren’t on this list? Let me know in the comments! Thanks for reading!
Bibliography
Cagle, Brooke. “Freelancers meeting at a coffee shop.” Unsplash photo, November 26, 2018.Harris, Mikey. “Working from home.” Unsplash photo, June 5, 2020. (Thumbnail photo).Heftiba, Toa . “Working Space.” Unsplash photo, August 16, 2018.Venture, Elisa. “A business woman who is stressed and frustrated,” Unsplash photo, May 17, 2021.
Related Topics
Get Your FREE Story Binder Printables e-Book!Freelancing Basics15 Misconceptions About FreelancingEditing Misconceptions: Book Editors Aren’t Monsters20 Tips and Tricks for a Successful Email NewsletterHow To Submit Your Writing To—And Get It Published In—Literary Journals8 Reasons Why Having A Creative Community MattersThe Importance of Befriending Your Competition4 Of The Most Useful FREE Apps For Writers (2022)Payton's Picks: The Best Books On Writing BooksCheck out my other Freelancing posts!
Recent Blog Posts


This blog post was researched, written, and published by a human author without the assistance of generative artificial intelligence (gen-AI). Gen-AI models are trained on text written by humans, therefore, the presence of specific punctuation, verbiage, tone, or predictable, marketing-style phrases alone are not sufficient indicators of gen-AI usage. I implore readers to use context clues, critical thinking, pattern recognition, research, and employ their best judgement when determining the validity of human authorship of print and digital media today. If you want to learn more about my stance on gen-AI and it’s role in media and the publishing industry, I plan to release a blog post on this topic very soon, so stay tuned for that. This disclaimer will be updated once that post goes live. In the meantime, I will continue to be transparent about which tools and resources I use in my work.

For Content Creators and CEOs with ADHD: Strategies to Succeed Despite Overwhelm and Distractions
Learn how CEOs and content creators with ADHD can thrive amid overwhelm and distraction. Discover practical ADHD-friendly systems—like daily planning tools, the Pomodoro Technique, and chunking strategies—from author Payton Hayes. Boost focus, eliminate burnout, and build sustainable routines that enhance leadership and productivity.
This blog post was written by a human. Hi readers and writerly friends!
As someone with severe adult ADHD, I personally know how this neurotype can affect one’s personal and professional life. ADHD is a neurodivergence, not a disorder, and worth looking into whether or not you have been diagnosed with it. Readers and writers, I’ve created a list of tips and tricks (ADHD friendly) that can help you in your business whether neurotypical or neurodivergent, like myself. If you’re in a rush, check out the headers and sections in bold to get the most out of skimming this post.
Note: Some of the advice in this blog post is from my own personal experience, tips and tricks from other people I know who have ADHD, and the book, Mastering Your Adult ADHD: A Cognitive-Behavioral Treatment Program, Second Ed. Client Workbook by Steven A. Safren. Any quotes from the workbook are cited in-text and at the end of this post (Safren 2017)

Rearrangeable Corkboard Calendar. Photo by Monica Sauro.
Calendars, Planners, and Daily Task Lists
As per the workbook and my own experience, having a toolkit of simple, practical, sustainable, and daily organization and planning tools is key to combatting prioritization-confusion, time-blindness, and forgetfulness in general. This is true for people with and without ADHD. Having a 3-step planning system ensures consistency and employs repetition —a useful tactic for remembering important tasks day-to-day, week-by-week, and month-to-month. I’ve been using this system for three months now, and it has changed how much I can get accomplished in a single day. I’m not advising you go overboard with adding tasks to your plate and burn yourself out. But you’ll be amazed at the productivity and action you can achieve by employing a simple planning routine that can be scaled up or down and modified in many ways to fit many different lifestyles and stages of life.
How to execute this planning strategy:
Use a Calendar for a monthly view. This can be paper or dry-erase calendar, but make sure its simple and big enough to write 1-3 important tasks, appointments, or events in each day’s space.
Use a Planner or weekly agenda for keeping up with tasks throughout the week. Realistically plan your days so that you can get your professional and personal work done in a timely manner without overworking yourself. Unless you can consistently produce quality results, stick to no more than 3-5 tasks a day until this becomes a habit. Pick out a planner that you like and avoid choosing frills over functionality. The more space the better. I prefer just a plain planner with a calendar view for each month and a few lines for each day of the month in an agenda format. Ensure the planners size can accommodate your handwriting as well as portability, because this will be your middle-man between your home calendar and task list as well as your point of reference when away from home.
Use a Daily Task List for daily task planning and organization. Again, limit your responsibilities to reflect your true capability and slowly add more tasks onto your plate when you feel comfortable doing so.
Pro Tip: Use the same color-coding system in your planner and task list as you do on your monthly calendar. Get colored pens that match your expo markers so that you can peek at either tool and read it at-a-glance, ensuring ease of understanding and consistency. Only use a color-coding system if it will benefit you, though. If you’re worried it will become too complicated, take too much time to set up, or you’ll get hung up on perfectionism, opt for 3 colors max, or skip this step altogether.
For Digital Planners: I would love to be more eco-conscious and go paperless, but the repetition of writing plans down 1-3 times helps me remember when and what I’ll be doing each day. This process also helps me to catch any discrepancies between one of my planning tools and I can catch mistakes (such as an event written on the wrong day of the month) much easier and usually before the event. However, if you’re really not one for writing things down and would prefer to go the digital route, there’s a few tools you can use to achieve the same 3-step planning system mentioned above.

Tablet displaying a virtual weekly planner. Photo by Jess Bailey.
Pick a good virtual calendar such as Google Calendar. Color-code events as needed and try to keep colors consistent across all apps and devices.
Use a good digital planner as well —below, I mention Notion as a great resource for note-taking but it can also serve as a fully-customizable virtual planner/agenda as well. If you’re overwhelmed by the customization, there’s a ton of other free and paid virtual planning/productivity apps out there!
Use a simple virtual notes app or list app such as Google Keep Notes or Google Tasks. Notes has more formatting options but Tasks has a satisfying check-off function for when you’ve completed tasks.
If you’re going the virtual route, use digital alarms to help you stay on track! The Pomodoro Technique is a great strategy for getting both quality work and breaks done in a timely manner. If you’re not going digital, keep hand-held timers around your house or at your desk in the office to use to help with time management.
The workbook provides some rules for effective use of the calendar and task list:
Rules for the Calendar and Task List
The calendar and task list system replaces ALL pieces of paper
Pieces of paper just get lost.
Instead of keeping an appointment slip, a business card, or anything like this, copy the information onto the task list or enter it directly on your calendar.
Phone messages from voice mail or other places go on the task list.
Log every phone message (from voice mail and so forth) on the task list as a to-do item.
If you date when you have completed the task, you will then have a record of having done it in case anyone asks you about it in the future.
All appointments go on the calendar.
No appointment slips that can easily get lost!
All tasks must go on the task list.
Task list items should be looked at EVERY DAY, and revised accordingly.
Do not obsess about trying to get a perfect system.
Many individuals want to have the perfect calendar and task list systems. Do not fall into this trap! This will just result in not having any systems.
If you cannot decide on the “best” system, then just use a simple calendar and task list system.
Remember it’s important to give your system a fair shot! This means keeping one system for at least three months, long enough to get used to it.
Use a system that is within your comfort zone.
There are many options for calendar and task list systems—including paper systems, applications on smartphones or tablets, and multiple computerized applications. Many of our clients ask us which is the “best” system, and this is not really a question that we can easily answer. The question for you to ask yourself is this: “What’s the best system for me?”
— (Mastering Your Adult ADHD, 29-30)
Manageable chunks
Downsize overwhelming parts into manageable chunks. Make step-by-step processes for tasks that seem daunting and go one step at a time. This will help you manage overwhelm, anxiety, and, unnecessary busy work. Make a list of items and order them according to due date or priority, and try to get them done as soon as possible. Do not wait until the last minute, no matter how tempting that next episode of Orange Is The New Black may be. Make a reasonable, executable game plan for your goals or project, and proceed one step at at time. Don’t get hung up on the details or perfectionism, just start.
“A good plan executed right now is better than a perfect plan executed next week.” —George S. Patton.

Woman looking through her weekly planner. Photo by Covene.
Task Prioritization with the A,B,C’s
Now that you know of an effective and sustainable planning strategy and you know to break overwhelming tasks up into more manageable steps, it’s time to prioritize. As mentioned earlier, without prioritizing tasks, its easy to get caught up in busy work. Getting a lot of tasks completed and crossed off your to-do list feels good, but is it really getting you closer to your goals? By being overly productive with mundane tasks, are you actually getting any important work done?
That’s where the A,B,C’s come in. I learned this strategy in the workbook as well:
List all of your tasks. Then assign an “A,” “B,” or “C” rating to each task:
“A” Tasks: These are the tasks of highest importance. They must be completed in the short term (like today or tomorrow).
“B” Tasks: These are lower-importance, longer-term tasks. Some portions should be completed in the short term, but other portions may take longer.
“C” Tasks: These are the tasks of lowest importance. They may be more attractive and easier to do, but they are not as important.
Be very careful not to rate too many items as “A”!
Practice doing all of the “A” tasks before the “B” tasks and all of the “B” tasks before the “C” tasks.
— (Mastering Your Adult ADHD, 34-36)
When first going over this concept, my therapist put it this way: “A” tasks must be done on the day they’ve been assigned to. “B” tasks can be moved to other days but not move more than a week away from their original date. “C” tasks can be infinitely moved and do not require a defined date/time. An “A” task might be going to a doctor’s appointment. A “B” task might be getting your car’s oil changed. A “C” task might be finishing a book you’re reading for pleasure. This prioritization strategy will look different for everyone, especially at different stages of life.
Just remember the priority: “A”= Highest importance, “B”=Medium importance, and “C”=Lowest importance. Avoid overwhelm and burnout by strategically spacing “A” tasks throughout the week if possible. Try to limit “A” tasks to no more than 1-3 things a day until you feel comfortable with this system.
Color-coding tasks instead: If you’d rather use a color-coding system for prioritization, traffic light colors Red, Yellow, and Green make a great color-combination for action! Red= Stop what you’re doing and do the most important tasks first. Yellow=Be cautious of time and complete the lesser-important tasks next. Green= Go! on tasks of lowest importance once you’ve completed Red and Yellow tasks first!
Just “Eat the Frog” or “Start”
Have you ever heard of someone eating the frog when it comes to content creation, their personal to-do list, or professional positions? This means to start with the hardest item or most difficult item on the to-do list. This item is typically something that requires research, planning, and time to execute. It is a task that requires more energy and time to complete. Often these tasks are called ”frogs” because they’re hard to swallow, or hard to get done and often include a lot of planning and/or procrastination. By getting them done early, one can look forward to the “downhill” slope throughout the day/list. Get the hardest task out of the way and it will be easier as the day goes on.
If you’re more of a “work your way up” to the hardest task from the easiest tasks, that’s okay too! Not everyone feels comfortable starting with the “frog".” Just make sure you’re not doing busywork or deluding yourself with a false sense of productivity. Ensure your actions and “warm-up” tasks are actually moving the needle, and getting you closer to your goals.
Make use of versatile apps and devices
I’m saving for an iPad and Apple Pencil so I can do digital artwork, digitize my existing physical artwork, and start creating unique animations for my YouTube channel. I’ve seen some pointillism artists doing dotwork with tattoo guns on paper, saving their hands the trouble and repetitive stress. Utilize the technology we have today to save time tomorrow.
Clickup’s Blog has tons of great resources for productivity and combatting ADHD. Greg Swan’s post “10 Best Mind Mapping Software (Pros, Cons, Pricing)” explains how mind-mapping can be a useful tool for productivity and breaking tasks down into actionable steps:
Mind map software lets you create a diagram or flowchart of your ideas. This helps you easily illustrate the relationships and hierarchy between concepts.
Most mind mapping tools come in different sizes to suit various needs, offering other functionality. Generally, your average mind map maker falls under one (or more) of these categories:
Diagramming: a technical diagram such as engineering flowcharts, architectural designs, network diagrams, etc.
Brainstorming: problem-solving sessions to organize and present an idea visually
Business intelligence: visualize data as charts by importing it from business applications
Software development: prepare site map diagrams, software wireframes, etc.
— (Swan, paragraphs 5-8)

Checkbox to-do list on paper. Photo by Thomas Bormans.
Take notes
When it comes to conventions, panels, educational videos, courses, classes and other avenues for creative information, remember to take notes —and not just cover vocabulary. Let’s get honest for a second, aesthetically pleasing notes make studying that much easier, for sure, but it’s not a necessary effort. As long as your notes are legible and cover important topics that will likely come up later (or for students, will be in the exam) then you are good to go. Feel free to digitize or edit your notes later. First, focus on jotting down as much information as possible.
Pro Tip: If you don’t feel confident in your ability to type as fast as the professor or speaker talks, then feel free to record the panel or discussion. Make sure you get permission/clearance before recording someone else. When you have time, type up and refine the notes into easily-digestible, succinct, effective, and at-a-glance notes. Put them on the wall, your vision board, or bathroom mirror to see them frequently until their concepts and advice is cemented solidly in your brain. Then, file your notes away in an organized fashion and make sure to refer back to them regularly.
Notion and other note-taking apps
I genuinely enjoy this app and the features it provides users. Notion has an almost overwhelming number of features and useful elements. I personally use the application to create lists, blog post rough drafts, flesh out poems, and to tack down other ideas, but this barely scratches the surface of Notion’s versatility. This post is not sponsored by Notion, nor am I affiliated with them.
Celebrate milestones, big and small
Don’t forget to celebrate hard work and milestones. Go out every once and a while to celebrate and acknowledge the hard work you’ve done. If the work is online, it can be especially hard to quantify successes or measure productivity, so go out every now and again and celebrate the small and big wins! Don’t. Skip. On. This. Even if you don’t drink, are veggie, or have a tight curfew, make sure you allow time for you to, celebrate both the small and big wins and really soak it in. When your supervisor gives you a compliment, treat yourself to a nice coffee, or when you meet a work or personal creative deadline early, grab that chocolate-chip muffin as treat (as long as your not on a diet, lol —look into other rewards systems if you’re alcohol-cruelty-gluten-free, etc.!”
FAQ pages
For entrepreneurs and creatives with websites, this page can save you a lot of time and trouble. Although it’s pretty self-explanatory, a Frequently Asked Questions (FAQ’s) page serves as a buffer between you and your reader’s repetitive, previously answered/address queries. Link the FAQ page in the footer or contact section of your website and put 5-20 of the most frequently asked questions there, to help avoid repetition and wasted time re-addressing the same questions over and over again.
Lead magnets
Sometimes called freebies, lead magnets are the little juicy bits of content that readers subscribe to your content in order to access. For cooking blogs, it may be a 20-page mini cookbook. For writing blogs, it may be a short guide for combatting writer’s block or a writing checklist. Just about any website can have a lead magnet and it’s the easiest, most automatic way to obtain an email address from a visitor to your site. Lead magnets are powerful, effective, enticing marketing tools and they’re very easy to create. Design a unique, actionable, useful piece of downloadable/printable content with an editor such as Canva and upload it as a downloadable file into your newsletter block on your website. Once the reader enters his or her email into the box and hits the subscribe button, they’ll be prompted to download the content they signed up for. Now you’ve unlocked another potential customer who you can market to, straight to their inbox, and they just gave you that access!
Minibatch and time-batch tasks
Similar to prioritization and chunking tasks into more manageable steps, minibatching tasks can serve as a useful strategy for planning, organization, optimization, and execution. To do this, break your larger tasks down into smaller, doable steps, then put those smaller tasks onto your calendar or planner, according to the type of activity required to complete the task. For example, if your car needs several maintenance tasks done, schedule a time to look at and order car parts, make appointments to the alignment shop and oil-change shop, and plan a day to get all the car work done. Another example, if you need to record videos, take photos, or hop on webcam, schedule these tasks all on the same day if possible. You’ll save yourself the time and trouble of getting ready for each individual appointment and get the most wear out of your outfit/makeup/hair-styling too!
Have frequent co-working sessions
Schedule in regular co-working sessions with friends, partners, and colleagues. These sessions are for working collaboratively on projects and brainstorming and are an amazing resource for creatives and office-workers alike. Friends can help you pick paint samples and the interior design of your living room, while colleagues can help you come up with new strategies for success in the workplace. Who says you can’t have coffee in the morning with a client in the morning and meet up with your bestie for lunch in the afternoon?
Schedule “people days”
Much like the time-batching tasks, schedule all of your face-to-face appointments, coffee-shop meet-ups, conferences, phone calls, and co-working sessions in the same day, when possible. This will save you time getting read for each appointment and once you’ve made it through the first meeting, you’ll be ready to tackle the next meeting as your confidence and productivity high snowballs you throughout the day.
ADHD management and CBT therapy
Regardless of if you’ve been diagnosed with ADHD or not, these tips can be useful for anyone who gives them an honest try because they’re practical, scalable, sustainable, effective, and simple. However, these tips may not be enough if your life is a hot mess like mine was in 2020-21. After having done my own ADHD management program and CBT program for PTSD, I can truly say it has changed my life for the better. I would recommend anyone struggling with ADHD symptoms to reach out to your primary healthcare provider and discuss options for treatment with them. Depending on the severity, you may require therapy, management, medication, or lifestyle changes in order to manage any debilitating or annoying symptoms you may have. I’m not a doctor —I just know this process helped me understand and embrace myself and gave me the patience and grace to work through my challenges without shame, fear, or judgement. Please do not diagnose yourself. If you feel you may be struggling with ADHD, contact your doctor or counsellor and have a formal assessment and diagnosis done.
Thank you so much for reading this blog post! If you liked this post, let me know what you thought of it in the comments below, and please check out my other posts! If you have any other actionable tips for productivity as a creative with ADHD, drop a comment below!
If you’d like to see more of my blog posts, consider subscribing below to get updates as soon as a new blog post is published! You’ll also gain exclusive subscriber-only access to the new and improved Story Binder Printables e-Book! Feel free to check out the recent blog posts linked at the end of this post as well!
Bibliography
Bormans, Thomas. “Free Pen Image.” Unsplash photo, August 30, 2020.Covene. “woman in white long sleeve shirt, holding pen, while writing on paper.” Unsplash photo, May 21, 2021.Fernandes, Nuberlson. “Man in white crew neck shirt wearing black framed eyeglasses.” Unsplash photo, February 27, 2021 (Thumbnail).Notion Labs Inc. “Notion - notes, docs, tasks.” Google Play Store, accessed 11, 2022.Safren, Steven A. Mastering Your Adult ADHD: A Cognitive-Behavioral Treatment Program, Second Ed. Client Workbook. Oxford: Oxford University Press, 2005.Sauro, Monica. “Brown calendar photo.” Unsplash photo, May 16, 2019.Swan, Greg. “10 Best Mind Mapping Software (Pros, Cons, Pricing)” ClickUp Blog. October 13, 2022.
Related Topics
Get Your FREE Story Binder Printables e-Book!8 Ways To Level Up Your Workspace And Elevate Your ProductivityGet Things Done With The Pomodoro TechniqueHow To Organize Your Digital Life: 5 Tips For Staying Organized as a Writer or Freelancer5 MORE Ways To Stay Organized As A Writer Or Freelancer20 Tips and Tricks for a Successful Email NewsletterSelf-Care Tips for Bookworms5 Healthy Habits For Every WriterWriting Every Day: What Writing As A Journalist Taught Me About Deadlines & DisciplineYoga For Writers: A 30-Minute Routine To Do Between Writing SessionsCheck out my other Productivity & Organization Writing Advice, Freelancing, and Content Creation blog posts!
Recent blog posts
This blog post was researched, written, and published by a human author without the assistance of generative artificial intelligence (gen-AI). Gen-AI models are trained on text written by humans, therefore, the presence of specific punctuation, verbiage, tone, or predictable, marketing-style phrases alone are not sufficient indicators of gen-AI usage. I implore readers to use context clues, critical thinking, pattern recognition, research, and employ their best judgement when determining the validity of human authorship of print and digital media today. If you want to learn more about my stance on gen-AI and it’s role in media and the publishing industry, I plan to release a blog post on this topic very soon, so stay tuned for that. This disclaimer will be updated once that post goes live.

Book Marketing 101: Everything Writers Need To Know About Literary Agents and Querying
Literary agents play a pivotal role in an author's journey toward traditional publishing, especially with major New York publishing houses. They act as intermediaries between authors and publishers, leveraging their industry expertise to secure favorable book deals, negotiate fair contracts, protect writers' rights, and ensure accurate compensation. While securing an agent is often essential for mainstream fiction and popular nonfiction targeting large audiences, it may not be necessary for niche markets or academic works. Understanding the commercial viability of one's manuscript is crucial; not all books are suited for major publishers, and many find success with mid-size or independent presses. Aspiring authors should research market trends and maintain realistic expectations about their work's potential reach.
This blog post was written by a human.Hi readers and writerly friends!
If you’re a returning reader, welcome back and if you’re new to the blog, thanks for stopping by! In this blog post we’ll be covering everything from querying basics to how to find a literary agent and land a book deal in the 2020’s, when more than 75% of books published by the big five New York presses get sold by literary agents. Literary agents are experts in the publishing industry and can be career-long mentors and managers and there’s plenty of reasons why writers both new and experienced alike could benefit from hiring an agent.
Agents are market experts and can secure the best possible book deal for their clients as well as negotiating fair contracts, protecting the writer’s rights, ensuring clients are paid accurately and fairly as per industry standards, and ultimately serve as the middleman between the author and publisher.
In 2021, more than 75% of books published by the big five New York presses get sold by literary agents. Literary agents are experts in the publishing industry and can be career-long mentors and managers.
Do I Need An Agent?
Honestly, it depends on the commercial viability of your book. If you want to be published by one of the five major New York publishing houses, (i.e., Penguin Random House, Simon & Schuster, HarperCollins, Macmillan, and Hachette) then you’ll need an agent to be sure. However, if you’re instead writing for a niche market (i.e., time period fashion) or wrote an academic or literary piece, then perhaps you don’t need an agent. Agents take on clients based on the size of the advance they think they can for the project. If your book doesn’t command a decent advance, then the project may not be with the agent’s time and you’ll have to sell it yourself. Unfortunately, most writers have a difficult time being honest with themselves about their work’s potential. We all want to see our names on the New York Times Bestseller’s list, but that’s just not a realistic expectation. It comes down to this: not every book is cut out to be published by a New York house, or even represented by an agent.
There are different levels of commercial viability in the publishing industry. Some books are “big” and are suited for Big Five traditional publishing houses, while others are “quiet:” books and are suitable for mid-size and small presses. If you’re realizing your work might not be a good fit for one of the major publishers, don’t despair. There are many mid-size houses, independent publishers, small presses, university presses, regional presses, digital-only publishers who might be thrilled to have you work —you just need to find them.
These types of books typically are suitable for a major traditional publisher:
Genre or mainstream fiction, including romance, erotica, mystery/crime, thriller, science fiction, fantasy, young adult, new adult
Popular nonfiction you’d see stocked in Barnes & Nobel —contingent upon a strong premise and existing author platform.
Major New York publishers usually won’t sign a nonfiction book unless it realistically anticipates selling 10,000 to 20,000 copies minimum.
To better understand what sells, consider picking up a month-long subscription to PublishersMarketplace.com and study the deals that get announced. It’s a quick and inexpensive education in commercial publishing. I’d also suggest taking a peek at the agent database at Literaryagencies.com
When To Query
Naturally, the easy answer is once the book has been completed. Truthfully, there is no one size fits all approach to figuring out when you should query your novel, but the query questionnaire below might help you determine based on the state of your manuscript, feedback you’ve received, and your experience with the writing process, whether or not you’re ready to query.
What Stage Is Your Manuscript Currently In?

Incomplete/Rough Draft. Graphic by Payton Hayes.

Critique Groups & Beta Readers. Graphic by Payton Hayes.

Revising/Editing Process. Graphic by Payton Hayes.

Querying To No Avail. Graphic by Payton Hayes.
If you are still in the preparation phases of the writing process, consider checking out my Manuscript Basics guide for some quick tips for formatting your manuscript for editing or submission.
How To Find An Agent
When it comes to actually selecting agents to query, you definitely should do your own research. Look into as much as you can find on current releases, popular titles, publisher names, top/mid-tier agents, authors, and trends in your genre. Finding a literary agent for your book is like finding a spouse —it’s a learning process and period of research best conducted by you and there is not one-size-fits-all approach to securing an agent.
PublishersMarketplace.com is the best place to research literary agents; not only do many agents have member pages there, but you can search the publishing deals database by genre, category, and/or keyword to pinpoint the best agents for your work. Some other resources to consider include QueryTracker (free and paid versions) and Duotrope.
If you really prefer to hire someone to find appropriate agents for you to submit to, try Copy Write Consultants.
Consider attending writer’s conventions and getting involved in editorial associations to build connections and organically network with industry professionals. Local writing workshops and bookstore/library events (such as indie author signings/readings) are great ways happen upon literary agents in the as opposed to seeking them out from behind the screen!
Assuming you’re ready to query, there’s a few common materials you’ll likely be asked to provide:
Query Letter - a one-page pitch letter that gives a brief description of your work
Novel Synopsis - a brief summary (typically no more than one or two pages) of your story from beginning to end
Nonfiction formal book proposal - complex proposal documents (Roughly thirty pages worth) to sell nonfiction books to publishers
Novel proposal - your query letter, a synopsis, and perhaps the first chapter. There is not an industry-standard definition of what a novel proposal is.
Sample chapters - the first two to five chapters of your manuscript. (Always start from the beginning of the manuscript; don’t select a middle chapter, even if you think it’s your best.)
Keep these questions in mind when researching agents in your genre:
What’s the agent’s sales track record? Examine their client list and the publishers they’ve recently sold to and determine based on your genre/category and your own sense of author identity if they’d be an appropriate fit for you and your project.
Does their communication with you and other writers inspire confidence?
Do they seem genuinely interested and enthusiastic in you and your project?
Additionally, you may want to keep these optional extra steps in mind if you’re waiting to hear back from queries:
Author media kit
Author/Book website
Author newsletter
New authors with an existing reader base are highly desirable to literary agents and publishers. Putting your work out into the world and building a fan base beforehand can easily give you a leg up over competing writers in your genre. (I’ll have a blog post discussing exactly how to do this in a future post so subscribe to know when that comes out!)

Hook, Book, and Cook Query Sandwich Formula
If the idea querying, marketing, selling, and putting yourself out there makes your skin crawl, then think about it this way: it’s much easier to sell to one person than to ten. If you have an agent, they will do all of the gross publishing heavy lifting so you can focus on writing and connecting with your reader base.
The three main ingredients of a great query sandwich are as follows: the hook, the book, and the cook. To start, the hook is the query —or the pitch, as mentioned earlier. Next, the book is the book itself (what key information about the book should you divulge to the agent on first impression). And lastly, the cook is the writer —you. In keeping with the sandwich metaphor — the “hook” and “cook” sections are the slices of bread and the “book” section is the meat of the sandwich — the slices are the least important part of the query and should take up the least amount of reading time in comparison to the meat.
Hook
You can probably guess why the first section of this metaphor is called the “hook,” but as expected, this section is specifically the pitch to the agent and it’s what “hooks” or demands their attention as a reader. Queries serve to sell the agent your story and the hook’s sole purpose is just that. It’s at most, a few lines to grab the agent’s attention and make them invested in your story and you as a potential client. If the agent reads the hook and finds their interest piqued, they might then read the description of the book and become even more interested to read more, (at which point you’ve “hooked” an agent and opened up connections for potential book deals).
Book
Center around character and work in subtle details about the world rather than info-dumping or over-worldbuilding. Your query isn’t the place for overly flowery vocabulary or backstory either. This section of your query should give the agent just enough of a taste to make them interested in being invested in the story, but not enough to give the plot away or disinterest them before they can even read it.
Be sure to keep storytelling elements character, conflict, and stakes at the forefront of your mind. This section of the query is designed to make the agent care, so show them enough character to make them make a connection and then weave in the conflict and stakes so that not only does the agent now know who the characters are, what they want, and what will happen if they don’t get what they want, but they’re also emotionally invested in the story, which is what will drive them to read it for themselves.
Pro tip: Don’t open the “hook” or “book” sections with rhetorical questions as a cheap grab at the agent’s attention. It’s overdone, comes off as try-hard, and doesn’t deliver the effect as intended so it’s better leaving them out altogether. Here’s an example: “Can Clara save the world and still make it to the school dance by 8? Keep reading to find out!”
Cook

Two women talking at a conference table. Photo by Amy Hirschi.
While the “cook” section of your query is technically about you, don’t give the agent your whole life story or try to cultivate any specific perception of you as a person other than being a writer. This section is your time to showcase your knowledge and experience as a writer and make the agent confident in your abilities. Consider any certifications or degrees you have earned, any workshops, courses, or masterclasses you’ve attended, or any writing clubs or critique groups you’re involved with and how you can use these connections to demonstrate that you’re a capable, competent, writer who is serious about sharing their work with the world.
Additional errors to avoid include mentioning side characters or love interests that do not critically pertain to the prevailing plotline, bogging down descriptions with hard-to-pronounce proper nouns and/or stylistic spellings. Likewise, remember the KISS method —keep it simple, sweetie. Simplicity, clarity, and subtlety are the keys to a great query.
Personalize Your Query
Some optional personalization to your query email includes introductions, genre comparisons, and any additional important/useful information about your novel/series as it pertains to the agents and marketing side of publishing.
One example of a great introduction/connection in action is when a friend of mine attended a writing conference where she unknowingly met her agent. She had never given agents much thought beforehand, but after attending a panel where several literary agents spoke about the book marketing process, she realized she needed to reach out. When she finally completed her book, she was able to break the ice in her query email simply by mentioning they’d attended the same conference and how her advice had helped her.
Don’t include that you’re a first-time or new author; your agent will assume unless you include any relevant published works or previous agents, that you are a new author. The “cook” section of the query is an excellent place to mention relevant writing/marketing experience.
You might also consider providing some comparisons for other books in your genre. Genre comparisons demonstrate to agents that you’re well-read in your niche genre and that you’ve done your research and understand the market you’re writing to. Genre comparisons can also provide a lot of marketing information such as where it might sit on the shelf, what demographic the book might appeal to most, what tones, themes, and tropes are to be expected from a book of any given genre. However, make sure you don’t outright put down other authors or genres when providing comparisons. You’d be surprised how many stories I’ve heard about writers who have included “my book is like so and so’s book but better” when the writer simply means they’ve put an interesting new spin on an old storytelling element.
Additionally, it might be wise to mention that your book is standalone or intended as part of a series. While we might know where the story is headed as the author, it’s ideal for a novel to both be able to stand on its own as well as having series potential, so try not to have your plans set in stone.
Check Agent Guidelines Before Submitting
At the end of the day, every agent conducts business differently and their submission guidelines may vary from one agent to the next. Ensure you’re doing everything in your power to result in a successful query by double checking your agent’s submission guidelines prior to submission. When it comes to personalization, some agents enjoy getting to know more about the writers that send in submissions while others prefer you simply leave it out. Checking guidelines before sending your query through will ensure you don’t push potential agents away by making careless mistakes.
Additionally, if it takes some pressure off, remember that if you simply take time to research your genre and potential agents, proofread and put effort into your query, and ensure that it follows agent guidelines, you will be a step ahead of your competition. Just by chatting with other editors and agents, I’ve learned that the general consensus is that most people just send a query off without a second thought and if you put even just a little extra energy into your query, that time and effort will shine through.
Note: Almost no agent accepts full manuscripts on first contact. (This is what “no unsolicited materials” means when you read submission guidelines.) However, almost all agents will accept a one-page query letter unless their guidelines state otherwise. (If they do not accept queries, that means they are a completely closed market.)
Sleep On Your Query Before Sending It
Once you’ve drafted the perfect query email, save it as a draft in your inbox for at least 24-hrs before sending it. When that time is up, sit down and re-read your query for any missed typos. I personally struggle with this and it’s why I always say everyone can benefit from a second set of eyes, even editors. Grammar, usage, and spelling are unfortunate errors that conceal the quality of your work, so thoroughly proofread your query before hitting that send button. Read it out loud or consider having a mentor or critique partner give it a second set of eyes. If you’re your only proofreader, get some distance from your query by literally stepping away from it and coming back with a fresh perspective so that you can catch any errors you might have missed in your previous revisions. That being said, don’t let this waiting period keep you from hitting send after your 24-hour timer is up. Draft your best query, sleep on it, reread it, put on the finishing touches and hit that send button. I find that if I procrastinate too long, I will actually end up forgetting to send it out. Try to aim for sending out that query after 24 hours and before 72 hours.
Do I Need An Editor Before Querying?
It’s completely up to you and how you feel about the state of your manuscript. Whether or not you hire an editor to polish your manuscript, your submission should be 100% complete and in its best version prior to querying.
Sara Megibow of the Nelson Literary Agency said “In general, too many submissions come through our slush pile that aren’t ready. In my opinion, an editor could have helped many of these books get to the next level. However, I acknowledge that hiring that person is expensive. If you are going to get an editor, don’t skimp - hire someone with credentials and client referrals in the genre of work that you are writing” and suggests that writers “read 3-5 books in your genre, published in the past 2-3 years, preferably by debut authors and published by major publishing houses” if they believe they need professional editing but can’t afford to hire an editor. (Megibow 2021) However, I think this advice is excellent for familiarizing oneself with their given genre. Inversely, you could find agents that represented your favorite books and research their work as well.
Keep Your Query Short & Sweet
Consider closing out your query email with a classic “Thank you for your consideration” and a “Sincerely, YOUR NAME.” Sign your email with your legal name (and if writing under a pen name or pseudonym include “YOUR NAME, writing as YOUR PEN NAME HERE” as well). There is no need to bog down the end of your email with statements such as “I look forward to hearing from you soon,” or “Will send manuscript upon request” because these are automatically assumed as part of the agent intake process. After closing your email, include your contact information and relevant social media links (author/public pages.) Omit these social links if you don’t already have a sizable readership. Don’t include photos, logos, or headshots either.
Simultaneous & Personalized Queries
The writer to agent intake process is inherently an individualized experience and should be treated as such. As writers with a vast overwhelming competition, it’s easy to see how mass-emailing could be tempting since getting a book deal seems like such a numbers game, but it’s more delicate than that. Agents are humans who make connections to stories just like our readers do and thus, you want to ensure you’re doing your research and finding an agent who will be a good fit for you. Querying an agent is a lot like cold emailing in business—it’s harder than most other forms of communication because you typically lack any prior relationship with your audience and you lack non-verbal feedback so you can’t modify your approach in real time, but it doesn’t have to be cold, per se. Much like with editors, writers can and should be encouraged to make a real, lasting connection with your agent and truly, your writing, book sales, and reader base will all benefit from having that genuine writer-agent relationship.
Another way to add some warmth and attention back into your cold queries is to always address agents by their name (never “Dear agent,”) and ensure their name is spelled correctly. Additionally, if you decide to use pronouns to regard your agent, ensure in each instance that the correct pronouns are being used. While you should never mass email a whole list of agents, it is okay to query multiple agents if you’re emailing them individually. Simultaneous queries are perfectly fine as long as you personalize each email for each individual agent. If you query several different agents simultaneously keep track of who you’ve queried and when. If you get any acceptance offers be sure to let the other agents know, especially if multiple agents are interested in your work.
Author Email Address and Professional Headshots
This seems like a no-brainer, but don’t put in all that work to come up with the most amazing query email only to have it flop on the transmission level of the process. As an author, you should have a professional email for all your writing business needs, but if you get a lot of traffic in your inbox already, consider creating an account designated solely for query submission. Ensure the email address itself is self-explanatory, easy to read, write, pronounce, and remember. yournamequeries@gmail.com is simple enough. If you have an author website or own your own domain, then hello@firstnamelastname.com is another great option. For your profile photo, consider a professional business-style headshot photo or a company logo if applicable. If you want to show some personality through your profile picture, try to avoid obscene or offensive imagery.
Leave Rejection Letters On Read
Don’t waste your time by sending responses to rejection emails. It might be tempting ask them to elaborate on any feedback they gave you or to thank them for notice of rejection, but it’s just not necessary at the query stage. Agents can provide incredibly useful feedback when appropriate, but in response to a rejection email is not the place to seek out further feedback. Delete the rejection email, move that agent’s message history to your archives, and move on to the next query email.
Smart Query
Smart querying is the perfect combination of querying best practices, batch querying, and cold email marketing tactics that serves as the single most effective strategy for landing literary agents out of thin air.
Put Together Your Agent Pool
Once you’ve done some market research and you feel like you have a decent grasp on publishers and agents that deal in your genre, start building a pool of agents who you can smart query and query again later. To establish a truly effective agent pool, come up with a mixture of middle and top tier agents as well as agents who typically are known for responding slower/faster to query submissions. It’s generally a good idea to have a healthy mix of different kinds of agents for your genre (as opposed to all top-tier or all quick-responding agents) because you may want options. Likewise, agents that work independently or alongside publishers are good to add to the mix. Additionally, consider querying to agents that represent different demographics that your book may appeal to (such as marginalized or underrepresented communities). A wide variety of stable, established agents as well as emerging agents with potential, is essential to successful and smart querying.
Test Batch Queries
One key element of smart querying is “test batch querying” where like the name suggests, you send out query emails in strategic batches. Unlike just mass-emailing, agents test batch querying allows you to essentially test-run your query before putting all your eggs into baskets. To batch query, choose 3-5 agents from your pool who respond quickly to queries (leave your dream agents out of test batches) and send your query to them first. If you get 1-2 interested responses (they’re requesting the full manuscript for review) then your query is working, and you can open it up to the rest of the agents in your pool. If you find that agents are getting to the manuscript and losing interest, your manuscript may need more attention first.
Pro Tip: When building your pool of agents to query, do your due diligence on various social media platforms. Research your prospective agents on and off the page and ensure your values and work ethic align to avoid any creative differences in the marketing process down the line.
Feedback & Follow-Ups
This may seem obvious, but be sure to take any and all writing-related advice and feedback with a grain of salt, of course. Literary agents, like editors and writers, are all just readers and book lovers at the end of the day. They too are looking for the next greatest story to fall in love with. They make real, meaningful connections to characters and events, so the main goal of a query letter isn’t to sell your story to the agent, but rather to make your story matter to an agent.
After you send out queries, you’ll get a mix of responses, including:
No response at all, which means it’s a rejection. Don’t sweat it—this is normal. Read it, sit with it for a moment, appreciate the opportunity, and move on.
A request for a partial manuscript and possibly a synopsis.
A request for the full manuscript.
If you receive no requests for the manuscript or book proposal, then there might be something wrong with your query. If you succeed in getting your material requested, but then get rejected, there may be a weakness in the manuscript or proposal. You might occasionally receive personalized feedback regarding the state of your manuscript but it’s not standard practice.
Keep in mind that a literary agent’s inbox may be swamped with queries from other writers so it may take them some time to get to your query. If the agent has outline specific query guidlines on their website or social media, look out for estimated response times. If the agent has specified that you can expect to hear back as early as thirty days, then set a reminder to follow up within one week of that estimated response date. If the agent has specified that you can expect a response within two weeks, schedule your follow up for three weeks out. This allows the agent extra time to review your manuscript without being pressured to respond too quickly. A good rule of thumb is one month for independent agents or agents working smaller imprints; for agents working with larger publishers, allow at least three months before sending a follow up. Regardless of the notoriety of the agent, if you don’t recieve a responsee after your first query or your follow up, then its most likely a silent rejection. Don’t send another follow up and don’t send another query to that agent for that specific manuscript later on. Consider it a rejection and move on.
And that’s it for my extensive guide on literary agents and querying! Thanks for checking out my blog post! Did you find any of this helpful? Please let me know and don’t forget to share your experience the comments below!
Bibliography
Copy Write Consultants. “Literary Agent & Publisher Research.” webpage, accessed September 11, 2021.DuoTrope. “Homepage.” Duotrope website , accessed September 11, 2021.Hayes, Payton. “Incomplete/Rough Draft.” Graphic created with Canva, September 11, 2021.Hayes, Payton. “Revising/Editing Process.” Graphic created with Canva, September 11, 2021.Hayes, Payton. “Querying To No Avail.” Graphic created with Canva, September 11, 2021.Hayes, Payton. “Critique Groups & Beta Readers.” Graphic created with Canva, September 11, 2021.Hirschi, Amy. “Woman in teal t-shirt sitting beside woman in suit jacket.” Unsplash photo, (Thumbnail photo) March 5, 2019.Megibow, Sara. “Should You Hire an Editor Before Querying? Agents Weigh In!” Adventures in YA Publishing, July 6, 2014.Publishers Marketplace. “Home.” Publishers Marketplace website, accessed September 11, 2021.QueryTracker. “Home.” QueryTracker website, accessed September 11, 2021.The Directory of Literary Agents. “Find USA Book Agents Looking for New Writers | List of Literary Agents 2022-2023.” Literary Agencies Website, accessed September 11, 2021.
Related Topics
Get Your FREE Story Binder Printables e-Book!NaNoWriMo: 25 Tips To Help You Write A Book In 1 Month! + Free NaNoWriMo Printables20 Tips and Tricks for a Successful Email Newsletter8 Reasons Why Having A Creative Community MattersThe Importance of Befriending Your CompetitionBook Writing 101: How To Come Up With Great Book Ideas And What To Do With ThemBook Writing 101: How To Write A Book (The Basics)Book Writing 101: Starting Your Book In The Right PlaceBook Writing 101: How To Choose The Right POV For Your NovelBook Writing 101: How To Achieve Good Story PacingBook Writing 101: How To Name Your Book CharactersBook Writing 101: How to Develop and Write Compelling, Consistent CharactersBook Writing 101: Everything You Need To Know About DialogueInfo-Dumping in Science Fiction & Fantasy Novels by Breyonna JordanHow To Write Romance: Effective & Believable Love TrianglesHow To Write Romance: Enemies-To-Lovers Romance (That’s Satisfying and Realistic)How To Write Romance: 10 Heart-Warming and Heart-Wrenching Scenes for Your Romantic ThrillerHow To Write Romance: Believable Best Friends-To-LoversHow To Write Romance: The Perfect Meet CuteCheck out my other Author Advice, Marketing, Freelancing, Book Writing 101, How To Write Romance, and How To Get Published posts.
Recent Blog Posts
This blog post was researched, written, and published by a human author without the assistance of generative artificial intelligence (gen-AI). Gen-AI models are trained on text written by humans, therefore, the presence of specific punctuation, verbiage, tone, or predictable, marketing-style phrases alone are not sufficient indicators of gen-AI usage. I implore readers to use context clues, critical thinking, pattern recognition, research, and employ their best judgement when determining the validity of human authorship of print and digital media today. If you want to learn more about my stance on gen-AI and it’s role in media and the publishing industry, I plan to release a blog post on this topic very soon, so stay tuned for that. This disclaimer will be updated once that post goes live. In the meantime, I will continue to be transparent about which tools and resources I use in my work.

8 Ways To Level Up Your Workspace And Elevate Your Productivity
Not only is my new workspace such a refreshing place to be in now, but it serves as a fabulous backdrop for my video calls and meetings. If that’s not enough for you, a room this beautiful just makes me so excited to show up and get to work.
Hi readers and writerly friends!
With all of the craziness of the pandemic and most people working from home now, it has become more important now than ever to tailor a special, intentional space for you to do your work and to do it well. Whether you work in an office with a team or from the comfort of your own home, your workspace can have a major impact of the quality of the work you produce and how you feel physically and mentally while you work. Since people are working from home more in 2020 it’s absolutely crucial that you set up your home office for success.
Stay tuned to check out these 8 must-haves for your at-home or in-office workspace so you can always accomplish your best work:
Get the right chair
Making sure you get your best work done starts with a comfortable workspace and a comfortable workspace begins with your seat. A comfy desk chair is an absolute must-have when you’re spending a lot of time seated in deep work and its certainly not an investment you want to skip.
Do some research on what features come with the desk chairs available to you. Consider quality, comfort, aesthetic, and pricing. I’d love to recommend my IKEA Kimstad White Millberget Swivel Chair because it is so comfy! And if you’re wanting something a little fancier, the Furmax Ribbed Office Desk Chair is a great alternative. If you’re looking for a few other chair choices, Forbes has an amazing list of office chairs from best quality to budget options.

Bright and airy workspace. Photo by Adrijana Bozic.

Bright and airy workspace. Photo by Adrijana Bozic.
2. Wallpaper or new paint
Friends, it’s time to ditch the drab drywall and add some color to your space. I recently renovated my home office by painting the walls and changing out the curtains. I went from a horrid creamy yellow color and black curtains (yeah, right? What was I thinking?) and opted for medium gray walls with a beautiful teal accent wall and sheer, teal curtains instead and let me tell you, it has made all the difference. Not only is my new workspace such a refreshing place to be in now, but it serves as a fabulous backdrop for my video calls and meetings. If that’s not enough for you, a room this beautiful just makes me so excited to show up and get to work.
As mentioned, you can add an accent wall if wallpapering or painting all four walls is just too daunting at this time. Removable wallpaper is a fantastic option for experimenting with different aesthetics— just stick it on and peel it off when you’re done.
You can find removeable wallpaper just about anywhere, but I recommend supporting fellow artists on Society6. You can find some unique and amazing wallpaper designs for a special, tailor-made workspace.
Pro tip: If you can’t commit to wallpaper or painting, consider checking out wall hangings and tapestries instead. These are a great way to add in a pop of color to your space in a less-invasive, less-permanent way. Society6 sells artist’s work in tapestries and wall hangings as well.
3. Lighting
It’s no secret that lighting is a big deal both in and out of the content creation world. Whether or not you’re working for someone else or yourself while you work from home, the quality of your work will suffer if you’re not working in the right lighting. Don’t strain your eyes. Good lighting is essential for focus and productivity. Science shows that poor lighting can ultimately impact your mindset—this study from the NIMH has found that light directly impacts mood and learning.

My Chesapeake Bay Pearlized Rain Glass Oil Diffuser. Photo by Payton Hayes.
It’s obvious that a dim, dull room doesn’t exactly do wonders for your motivation. The LE Dimmable LED Desk Lamp is one of my all-time favorite additions to my at-home workspace. With the adjustable brightness, low-profile footprint, and collapsible swivel arm, this light is perfect for both small and larger home offices. Himalayan Salt Lamps and Essential Oil Diffusers are great additions that have added benefits such as air purification and aromatherapy. I have this gorgeous Chesapeake Bay Pearlized Rain Glass Diffuser that doubles as a lamp when I want a softer light in the evenings. In that same vein, candles are also a great way to cozy up a bland office space —just make sure they’re all natural, soy-based candle, such as these lovely vegan candles from Halarosis.
If you’re going to be creating video or attending a lot of zoom meetings, this mini ring light and tripod stand is a must-have. You can easily level-up your professionalism in your online meetings or videos by upgrading your lighting and backdrop.

Bright and airy workspace. Photo by Adrijana Bozic.
4. Desk Setup
I’d venture to guess that most of your work happens at or around your desk, so assess your current workstation situation. Is your desk cluttered and messy? Are there papers and pens scattered about? Is there a Starbucks cup graveyard in your trashcan? Is it completely bare and boring? Is it easy to locate everything you need, or do you need some more organization?
Level up your desk set up with some simple organization tools to help you waste less time searching for objects and spend more time doing what’s important. Monitor desk mounts and monitor stands can be a great way to create more diskspace if you’re working with a smaller set up. And if you really want to level up your desk, consider swapping out your current set up for a standing desk. This one can be raised or lowered with the press of a button, and it offers preset options so you can easily adjust it as needed throughout the day. One of my colleagues uses a standing desk and she swears by it. It’s a great way to break up hours of sitting with a little movement and get better blood flow to the lower half of your body.
5. Organization
Be prepared for anything by keeping all your essential office supplies nearby in your home office. Depending on what kind of work you do, it’s a pretty safe bet to stock up on all the office basics: paper, pens, printer ink, tape, staples, etc. Having these items readily available in your workspace helps you stay organized and productive. Filing systems, pen and pencil holders, are a lifesaver for keep all of your must-haves tucked neatly away but still within reach. This beautiful rose gold organizer is my go-to and can be a great addition to your space to keep you from losing important papers in all those would-be piles. It also has divided compartments for easy access of the supplies you reach for the most. Keep the bulk of your supplies stockpiled somewhere out of the way and keep only what you need at your desk.
Likewise, if you don’t want to use an on-desk organizer, consider using a bulletin board or in-desk filing system. This great corkboard is affordable and available on amazon here. You can also stay organized by using a white board, desktop calendar, or planner. The possibilities are endless! Just do what works for you and helps you to keep organized and productive.
6. Office plants
Where are my green thumbs at? Adding in a plant or two is a great way to purify the air while doubling as cute décor. If your workspace is feeling a little bland, an office plant might be just what you need. Good news for my friends who aren’t particularly plant-inclined: you don’t have to be a seasoned gardener to keep most office-friendly plants alive.
This article by Sophie Lee from NBC News, explains how Houseplants directly affect our health in a positive way:
At work, place plants, especially those with broad leaves, on your desk; they will help regulate humidity and increase levels of positivity — seeing greenery and nature help us feel more relaxed and calm, which in turn benefits your everyday mood.
— Sophie Lee, NBC News
You can read the full article here.
My go-to office plants are snake plants, ivy, and monsteras. Snake plants require minimal attention and can add some vibrancy back into your office space. Ivy plants can be a beautiful touch to any room with taller shelfs or high places for the plants long curtain of tendrils to cascade down. Monstera plants are great for bigger spaces and can give your home office a tropical vibe. Bamboo, succulents, and aloe plants are other low maintenance choices. And failing that, you can always spruce up your workspace with fake plants too!

Pink desktop decor. Photo by Adrijana Bozic.
7. Customize your office
One awesome perk of working from home is the ability to design your office the way you want to. Add in your own style and make sure your workspace feels like you. Whether or not you’re actually your own boss, it’s much easier to focus and be productive when you feel at home in your office. Customize and decorate your workspace in a way that gets your excited to do your most important work. Add in some personal touches such as a photo with a friend or a note from a loved one. These kinds of personalized additions not only help level up your workspace but they can cheer you up on tough work days when you need an encouraging reminder of who you are and the people who believe in what you can do.
This photo holder is great for displaying multiple pictures in one small space. You can also create a mood/vision board with motivational quotes, positive affirmations and your personal goals for a custom collage that reminds you to keep pushing towards your goals.
8. Tidy up any and all clutter
If you’ve been around here for any amount of time, then you might know how much I love Gretchen Rubin’s book Outer Order, Inner Calm: Declutter and Organize to Make More Room for Happiness and we’re going to touch on that again real quick. Too much clutter piling up in your workspace can eventually get to you, even if you’re an organized-chaos type of person. To stay efficient and productive, make sure everything has a place and regularly tidy up to keep everything in order. A great way to combat daily clutter is to use the tried and true ‘Leave the Room’ rule. Whether its your empty coffee cup after a day’s work or the overflowing paper bin, making sure to complete one tidying up task every time you leave the room will do wonders for keeping your workspace tidy with minimal effort. This practice takes seconds and will save you so much time in the long run.
And that’s it for my eight tips on how to level-up your home office or workspace! What do you think of these tips? What are your plans for sprucing up your workstation? Let me know what you thought of the post in the comments below!
Related topics:
How To Organize Your Digital Life: 5 Tips For Staying Organized as a Writer or Freelancer
Yoga For Writers: A 30-Minute Routine To Do Between Writing Sessions
Spring Cleaning For Writers: 10 Things Every Writer Should Do Before 2020!
—Payton

The Importance of Befriending Your Competition
Building relationships with competitors can provide significant benefits in any industry. Rather than viewing others as threats, collaborating and exchanging knowledge can lead to mutual growth. Competitors often offer valuable insights, opportunities for collaboration, and the potential for referrals when workloads overflow. Additionally, forming genuine connections fosters a supportive network where professionals can learn from one another’s successes and mistakes. This mindset encourages shared learning, resource exchange, and creative partnerships that benefit everyone involved.
Hi readers and writerly friends!
Now that we’ve wrapped up everything to do with college (for now) we’ll be discussing competition and the importance of befriending your competitors. There’s a lot a new writer/editor can learn from seasoned professionals and there’s a lot of fresh perspective that rookies can bring to the table as well. Making connections in the bookish world has proven invaluable to me as both a writer and an editor. Keep reading if you’d like to see why its so important for new creatives to befriend their competition.

A photo of a Monopoly car game piece parked on the “GO TO JAIL” board position. Photo by Suzy Hazelwood.
So, there you are, out in the wilderness of the publishing landscape you spot a competitor. You have three options. You either a) cower in fear, hoping they don’t see you, b) assert your awesomeness, hope they do see you and they cower in fear, or c) you outdo them in some way, therefore establishing creative dominance. It’s your turn, what do you do?
Okay, hold up. If you picked any of these answers, just stop. Do not pass go, do not collect $200. You lose.
You can learn from your competitors. If they aren’t being stingy with their knowledge, then most everyone you come across (whether or not you are in the publishing industry) would be willing to share some sort of advice. The #1 biggest misconception about competition in ANY industry is that competition is bad or that your competitors are inherently your enemies. This is simply just not true. There is so much you can learn from your competitors, and instead of treating them as your nemesis, consider befriending them for a mutually beneficial connection, and better use of your energy.
This awesome quote from John Barrows comes to mind:
“You can learn something new from everyone and every situation.”
—John Barrows
He’s exactly right. This goes for people in and out of your respective industry. You can learn something new from every person you meet. You can learn something from your competition as well. Learn from them so you don’t have to make the same mistakes that they do. Follow in their footsteps and take notes on what works and what doesn’t. I’m not saying to copy anyone, but people who have been in the biz for years have tried and true formulas that guarantee results and you can use their established methods to get you ahead.
Additionally, your competitors are full of knowledge, resources, and tips and tricks. Of course, the mentors that come to mind are my colleagues, fellow writers, and the Developmental Editors Connection group on Facebook. Honestly, if I had a dollar for every time I went to them with a question, I’d not only have tons of incredible advice, but I’d also have enough money for double the cappuccinos each week. I can’t imagine all the times I might have gone wrong without their help. The same goes for a few of my writerly friends who started out as competition for me. I would know about a fraction of what I know now by ignoring the obvious opportunity to make a valuable connection with someone else in the industry. I’m eternally grateful for all of the editors and writers who have taken time to guide me—even in the smallest of ways such as quick questions about the CMOS or Microsoft Word issues.
You can collaborate with one another. Just imagine getting to work with your competition to create something amazing. How awesome would that be? There’s a reason YouTube collabs are so popular—it’s a group project that benefits everyone involved. And the same goes for industry collaborations. And often, by working together, you can trade information and produce double the content in half the time.
They can guest blog for you. I see this all the time in the online publishing sphere. Newer freelancers ask to guest blog for bigger content companies and more established freelancers help the newbies get their own content rolling by writing for them. Much like the collaboration thing, guest blogging for one another can help you can your competitors expose your writing to broader audiences. For example, if you guest wrote for my blog, my readers would find you and if I guest blogged for you, your readers would find me. (And if you’re worried about oversaturation being a thing, don’t worry—it isn’t. Click here to read my blog post about it.
You reciprocate with one another. Touching on the guest blogging, collaboration, and knowledge comments I mentioned above, having a friend in your competitors allows you to reciprocate advice, knowledge, help, ideas, and friendship to one another. Being friends with your competition gives you someone to bounce ideas off of, share resources with, and lend an ear or advice to each other. I love being able to recommend my favorite industry resources or current faves to my writerly friends and fellow freelancers. Likewise, its fun to compare services, prices, and styles with other freelancers. I mean, just imagine if someone asked me for advice regarding rates and I had to tell them, “Well, I’d love to help, but you’re kinda my competition. We’re in the same line of work, you know. We’re both editors…so I’d better not.” Ugh, isn’t that just the worst? Total jerk move. You’re losing absolutely nothing by helping your competition out. You get the chance to throw someone a bone, so take it.

Monopoly money, player pieces, and dice. Photo by Suzy Hazelwood.
They can help you get jobs. One of the biggest complaints I hear from freelancers concerning their competition is that they will lose customers/clients to the competition. This one makes me laugh out loud because I can’t tell you how many clients have come to me straight from people I might have considered my competition—editors just like me. There’s enough work and enough clients to go around. If you’ve heard the saying, “Everyone and their mom is a writer,” then it makes sense that everyone and their mom will also need an editor.
I’ve had several clients referred my way by word of mouth from my fellow freelancers and it’s a great feeling knowing I have such an amazing network of colleagues to work with. And the thing is that, as a developmental editor with very specific genre preferences, I don’t want to edit every manuscript ever. My editing skills are best suited to certain types of fiction, so of course, I’m not going to edit a piece of medical writing. But, I know other freelancers who do edit that type of material. And they know they can always refer fiction clients my way in turn.
They love writing as much as you do. This goes without saying but this fact doesn’t just apply to writers. How cool is it to have friends that love the same things you do? This is what got me so exited about college, because I really enjoyed talking with my fellow writers in my English classes. I can’t talk to my dad about the gothic elements in Edgar Allen Poe’s “the Fall of House Usher,” or gush about the homoerotic elements in Walt Whitman’s poetry. But you know who I can nerd out about literature with? That’s right—my editor friend and mentor Kris! We go crazy for the oxford comma, coffee, and cats. We swap poems with each other and workshop them in our free time. She just gets me. And when I’m editing a particularly gnarly manuscript, I can vent to her about it. She not only understands my pain but sends me writing memes to cheer me up.
It teaches you good sportsmanship. You can’t get all the clients and you can’t edit all the manuscripts. This also applies to any other industry with competition, such as sales. Sure, there’s been instances when my fellow editor friends and I are going for the same client. So what do I do when I don’t get the client and my colleague does? I just cry and give up. It’s the end of the world. I might as well pack up shop and give up forever because I’ll never make another sale ever again. Woe is me! Yeah, right. I say, “Good for her/him” and remind myself to step up my own game for next time and move on. It’s really not the end of the world. Like I mentioned before, there’s plenty of work to go around. Don’t get hung up on the one or two or ten missed sales. There’s just as many clients for you.
You cheer each other on. Similar to the previous point, you can celebrate your competitions wins and be there for them during their losses. We’re all in the writing game together. As a team, (if we’re continuing with the sports metaphors) its important to surround ourselves with likeminded individuals who will be rooting for us. And it’s nice to be able to congratulate others on their wins as well. If there’s enough work to go around—and there is, I assure you—then we can all take part in enjoying the process together. I know how much work goes into promoting my own editing biz so its really great seeing my fellow freelancers land new clients. I get to congratulate them and I know they’ll do the same for me in return. It’s a give and take, and I’d have it no other way.
You give love and get love. It’s such a good feeling when I have people coming to me about resources, industry hacks, friends using my blog post to answer someone’s question about newsletter marketing, or readers thanking me for how helpful my freelancing basics blog post was. You remember that friend, Kris I mentioned earlier? She told me her mother read my short story, “The Sieka of Sahn’Jatar” and enjoyed it immensely. I beamed when she told me this. It’s also fun when she and my other writerly friends send me funny writing memes or jokes about grammar, saying “this reminded me of you,” or “I thought you might like this.” I like getting messages like that and I love being able to share that love with them as well.
And lastly, everyone could use another friend. If you’re seriously so worried that you’ll lose business to someone just because their in the same line of work as you, then I think you’ve got a bigger issue on your hands. I don’t know—maybe we just view the world differently, but personally, I want to make even more friends with people that do the same thing I do. It’s not putting me out, endangering my business, or negatively impacting me in anyway to make friends with my competition and I can only see it as a mutually beneficial relationship. And besides, to quote Lady Gaga, “my biggest enemy is me.” It’s true. You can worry all day about your business failing to the competition but the only person you’re truly hurting is yourself. Instead, see if you can befriend your competitors and make some friends along the way.
Challenge: Readers and fellow freelancers, I challenge you to make connections with your competition this week. Find three people in your field who do what you do and reach out to them. Just ask them how they’re doing. Break the ice. Talk. Communicate. Build connections. We got to check up on our fellow writers during these crazy times. And you never know—you might find a new writerly friend out of it.
And that’s it for my blog post on the importance of befriending your competition. What do you think about making friends with your competitors? Do you agree or disagree? Can you think of a time when you befriended your competition and it worked out in your favor? Tell me all about it in the comments below!
Bibliography
Related Topics
Find Your Exact Genre, Find Your Lifelong Book Ambassadors by Shayla Raquel
Oversaturation In A World of Overconsumption (There's No Such Thing)
For Content Creators and CEOs with ADHD: Strategies to Succeed Despite Overwhelm and Distractions
8 Ways To Level Up Your Workspace And Elevate Your Productivity
How To Organize Your Digital Life: 5 Tips For Staying Organized As A Writer Or Freelancer
Recent Blog Posts

Written by Payton Hayes | Last Updated: March 19, 2025
5 MORE Ways To Stay Organized As A Writer Or Freelancer
It’s hard enough keeping organized as a person in general, but add being a freelancer and/or business owner into the mix—of course we’re going to feel a little in over our heads sometimes. Not to worry, though—I’ve put together a list of five ways to stay organized as a freelancer! Not a freelancer just yet? You can still use all of these tips to your advantage and hopefully they will help you move closer to your goal of being your own boss!
If you haven’t read the first blog post I wrote on this topic, click here!
Get organized digitally
You may have heard the words “spring cleaning” at some point in your life, but as an online content creator and freelance editor, I am here to tell you that this phrase doesn’t just refer to de-cluttering objects in your real life—it also means keeping organized virtually. As a Virgo (I think Jenna Marbles can relate!) there is nothing worse than a chaotic, cluttered room when I sit down to work. This is no different in my digital spaces. I try to keep everything just as organized on my computer as I do in my home.
Folders are labeled and sometimes colored, projects are divided up into parts, and everything has a place. I even have a method for planning and preparing my blog posts that go out every Friday. Monday mornings, I will start brainstorming, outlining, and designing my blog posts. I typically get them completed way ahead of time, but it’s nice to know that if I get stumped, I have until Friday at 12 PM CST to finish everything up.
I like to color-code my folders according to the four following categories: not ready, some parts completed, time-sensitive, and ready to post. I typically schedule three blog posts to go out at a time, but this system allows me to write posts ahead of time (or when I am feeling particularly inspired) and save them for later. I do this by using the free windows app, Folder Colorizer. To further organize, I break each project down into three parts: photos, thumbnail image/cover image, and the blog post text. It takes time to complete each of these tasks so by breaking them down, I can effectively time-batch similar tasks. (Keep reading!)


Calendar blocking
Calendar block like there’s no tomorrow.
This may look different for each person—Amy Landino practically blocks out every waking (and sleeping) second on her calendar. I personally, prefer to only block out things that aren’t part of my current routine or items that have changed in the routine, and once they become part of my everyday life, they get taken off the calendar. No matter how intense you go with your own calendar blocking, make sure that it is sustainable for you. You don’t want to just start throwing events and appointments up on the calendar without rhyme or reason! You might consider only blocking a few things to start with so you don’t get overwhelmed.
I prefer to use Google calendar. I have never enjoyed physically writing events out on a paper calendar or planner—maybe that’s just my inner perfectionist talking, but I truly do live for flexibility a digital calendar offers me. In addition to that, I can pretty much connect anything to my Google calendar—yoga classes, dentist appointments, and even bills! Also, Google calendar works seamlessly among your other Google accounts and can be connected to Trello if you use that, but it’s definitely not the only calendar to go with! You can even try out a few different calendars to see which works best for you. Like I said before, Google calendar is my go-to and that’s what you’ll see in the pictures below!

As you can see above, this is what my calendar looks like on a month-by-month basis. Of course some events change, I end up with different editing clients, and the occasional dentist appointment will arise. I like to block out only the items that are not routine/temporary routines such as an event that may be a week or month long. However, it doesn’t hurt to get into the details. You can always include your morning routine, nightly pre-sleep rituals, and gym days as well.


Of course, the next two pictures show you what my weekly and daily views for my calendar look like. You can see the different calendars I am subscribed to on Google calendar (with exception to a few for my own privacy/editing client’s privacy.) I like to include Out of Office appointments, so when several of them pop up in the same day/week I can save time by time-batching similar tasks! (I promise, it’s the next item in this list!) I further filter my tasks into calendars such as bills, writing/prep for this blog, designing merchandise and preparing for my next two poetry books, and work for my freelance editing business, to name a few.
Pro tip: Ditch the to-do list! Yes, they can help you get an idea of what you need to do in a day, week, month, or even a year. However, to-do lists are more of a brain-dump instead of color-coded, sorted tasks. When you start looking at a calendar more like a timed to-do list, it helps you prioritized the events in your life. Instead of just looking at an arbitrary list of wants and needs, filter tasks out into events and appointments in your calendar. If you have a hard time separating tasks that you need to get done versus tasks you would like to get done, then consider using a prioritization matrix.
Time-batch similar tasks
Time-batching is the art of grouping similar activities together to save time. For instance, if you are a YouTuber and you need to film a talking-head video, use the opportunity to film several in one day! (Just make sure to change your clothes and accessories so your subscribers don’t catch on!) If you know you have an interview or business meeting, why not take this opportunity (when you have made yourself presentable) to schedule a coffee date with an old friend to catch up? This not only makes great use of your time (and finely styled hair and makeup) but it allows you to build connections with the people in your life—whether they’re your lifelong friends or just a newly made acquaintance.
In addition to time-batching out of office appointments, you can time-batch project tasks as well! Like I mentioned above, I like to break down my projects into three smaller parts: photos, thumbnails, and text. However, instead of trying to crank out all three parts of the project in one sitting, I know I can more effectively complete projects by time-batching their similar tasks. If I am editing photos for one project, and I know I will need to edit photos for another, it just makes sense that I get all of my editing out of the way in one session. When I get on a role with writing, it is much easier to start working out the details of the next blog post after I’ve been typing for a bit and already have my writer-brain warmed up. If you’re a creative, you know how hard it is to break away from what you’re doing and is much easier to simply push on until the project is complete. I pair this almost unhealthy ability to stubbornly get things done with time-batching so that I can both achieve the highest level of productivity whilst maintaining a healthy work/life balance.
Only check your email once a day
I’ll be honest, I don’t always follow this tip, but when I do, I notice that I am so much more productive and less distracted. Sometimes, it just makes sense to answer all your emails at a set time instead of compulsively checking your inboxes to ensure they’re at 0. Set an alarm just after lunch or whenever you feel is best for answering email and only respond at that set time. This way, you can be in touch without having others think you have nothing better to do with you time.
Turn off your notifications
On a very similar note to the one mentioned above, turning off your notifications can be a huge boost to your productivity. Even if you’re not looking to increase your productivity, perhaps you want to be more focused or more mindful in the moment—and turning off your notifications will help you do just that! I personally only have notifications on for text and Snapchat and even then, my phone is typically on do-not-disturb. There is nothing groundbreaking that I absolutely must see the moment a piece of content goes live. I don’t NEED to be notified every time this influencer tweets that or a YouTuber posts a new video. It’s just another distraction that I don’t need while I am working. Additionally, if someone really needs to get my attention—my loved ones specifically—can break through my do-not-disturb.

As you can see, I don’t have many notifications turned on. Also, don’t be worried for me—that’s the most screen time I’ve had all week and I was editing photos today. 😉
So what do you think about these tips for staying organized as a freelancer? Do you think they’ll help you stay organized? Did I forget any tips that you love? Sound off in the comments below!
Thumbnail photos by Karolina Grabowska.
—Payton

How To Organize Your Digital Life: 5 Tips For Staying Organized as a Writer or Freelancer
When it comes to writing, something we don’t always keep in mind is how necessary it is to keep our materials/notes organized and our writing space clutter-free. If you’ve been around the blog for a moment, then you know I am a huge proponent of Gretchen Rubin’s Outer Order Inner Calm and I practically preach that book at any opportunity I get.
But it’s not just the “outer” organization that matters. In fact, as writers, we have several writing spaces that all need to be kept tidy in order for us to write stress-free. We have our digital space which encompasses the cloud, your PC or Mac’s hard drive, and your email inbox. Then, we have our physical space which encompasses our actual writing area such as our desks and the room in which we do the actual writing. Lastly, our most important writing space is our notebooks, binders, and folders that hold anything related to our books and their contents. By keeping all of these things organized, you set yourself up for success in your writing.
Keeping the Cloud Organized
This is probably one of the easiest elements of our writing space to keep organized. If you use Google Drive, One Drive, or Dropbox, then you know your content is safe and secure in the cloud so you can write freely without the worry of corrupted files or the loss of unsaved work. However, it can be quite easy to clutter up your cloud storage pretty quickly. One way to keep cloud storage organized is to routinely remove unnecessary documents and keep only the essentials in the cloud. The second way to keep your cloud storage organized is to create a file system that makes sense and is easy to navigate.
Pro Tip: While we’re on the subject of external storage, I have to take a moment to say how important it is to have a backup storage system in case of a power outage, file corruption, or anything else that can cause you to lose you work. The worst thing to happen to a writer is to lose all the progress you’ve made and have to start over due to poor storage practices. I keep a current back up of all my content both in the cloud and on an external hard drive.
Keeping Your Hard Drive Organized
Borrowing some advice from the first item in this list, you can keep your hard drive organized by creating a file system that makes sense and is easy to navigate. My favorite way to organize my folders for both writing, editing, and work on my website, is to colorize them with this handy little tool called Folder Colorizer. (Not affiliated with them, I just really love this application!)
In the screenshots below you can see how I colorize my folders for my website. The color-coding helps me know at a glance which of my projects need to be started, have been started and have some progress, and which projects are completed and ready to be posted. For a traditional book writer, this might look a little different, such as red for “to-do’s” yellow for “works in progress” and green for “completed” elements of your novel. By picking the novel process apart, it makes the project seem a little less daunting.

Color-coding folders with Folder Colorizer.

You can color-code folders with Google Drive (for free) as well, but color options are limited.

Keeping Your Email Inbox Organized
Inbox 0 is one of the most satisfying things ever. Maybe that’s saying something about how boring my life is but seriously, if you’ve never cleaned your inbox out completely, then you’ve got to do it! Unsubscribe from email lists that aren’t helping you grow as a writer or freelancer, delete old conversations, and organize that inbox! I have a “delete later” folder that houses all of my important but not that important emails that I want to hang onto for a little while. After a few months, this folder gets emptied, but it saves my inbox from getting cluttered.
Other folder ideas for email organization include:
5-year folder or 7-year folder for all business documentation —Read this post from Nolo that explains what types of documentation you should keep on record for your business.
Clients folder for emails between yourself and clients or your other site users and clients
B2B folder for emails from your business to other businesses
Legal folder for any important legal documents you may need to access easily
*Make sure to back up any super important documents in a secondary backup location.
Keeping Your Physical Space Organized

Rodrigo Cazanova’s Post-It Board keeps his writing organized. He says the purple notes are for the character’s travels, the pink notes are character interactions, the blue ones are info notes, and the green sticky notes are scenes.
This is probably one of the least fun of the organization methods I am suggesting but its completely necessary to creating a space that is conducive to writing. I won’t go on another rant about Gretchen Rubin, but I will show you a few ways to keep your physical writing space organized.
Create a file system or caddy for all your notes, notebooks, binders, etc.
Set up a clean and organized desk area to write (your bed doesn’t count!)
Use a dry-erase board, bulletin board, or post-it note system to stay on track
Design a vision board or playlist that reminds you of your novel, the setting, and the characters to help you stay focused when you sit down to write
Keeping Your Notebooks and Binders Organized
I prefer to use a binder, but some writers prefer notebooks. It’s all about what works for you and what is easier to keep organized. Kristen Martin prefers to use several different notebooks for different aspects of her writing and projects. A friend of mine from a writer group on Facebook prefers to use a bulletin board system for keeping his work organized. Another writerly friend I know uses a planner for her books. She outlines the book and sets a deadline, then uses the planner to help her stay on track throughout the writing process.
Since I prefer the single binder method, I have included a special kit for you guys! This printable set of binder pages will help you keep your writing notes organized and neat all in one place!
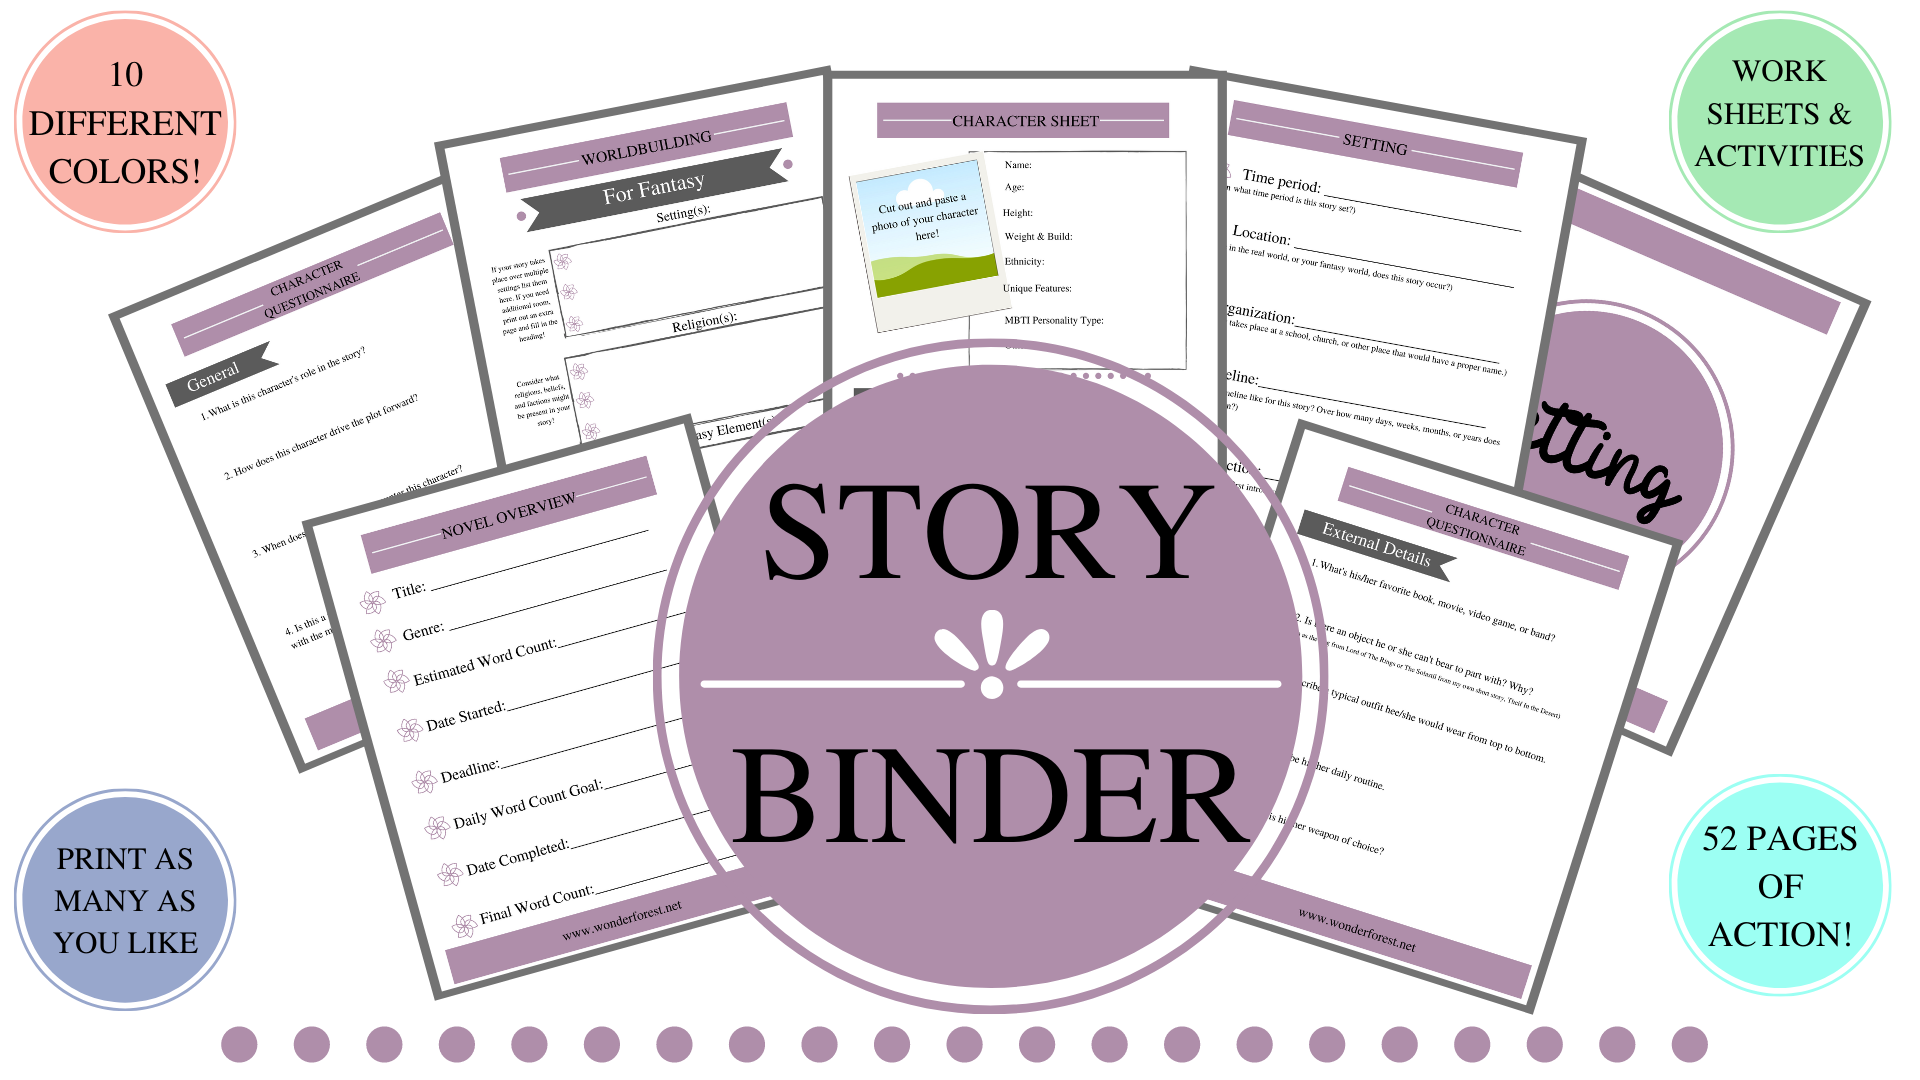
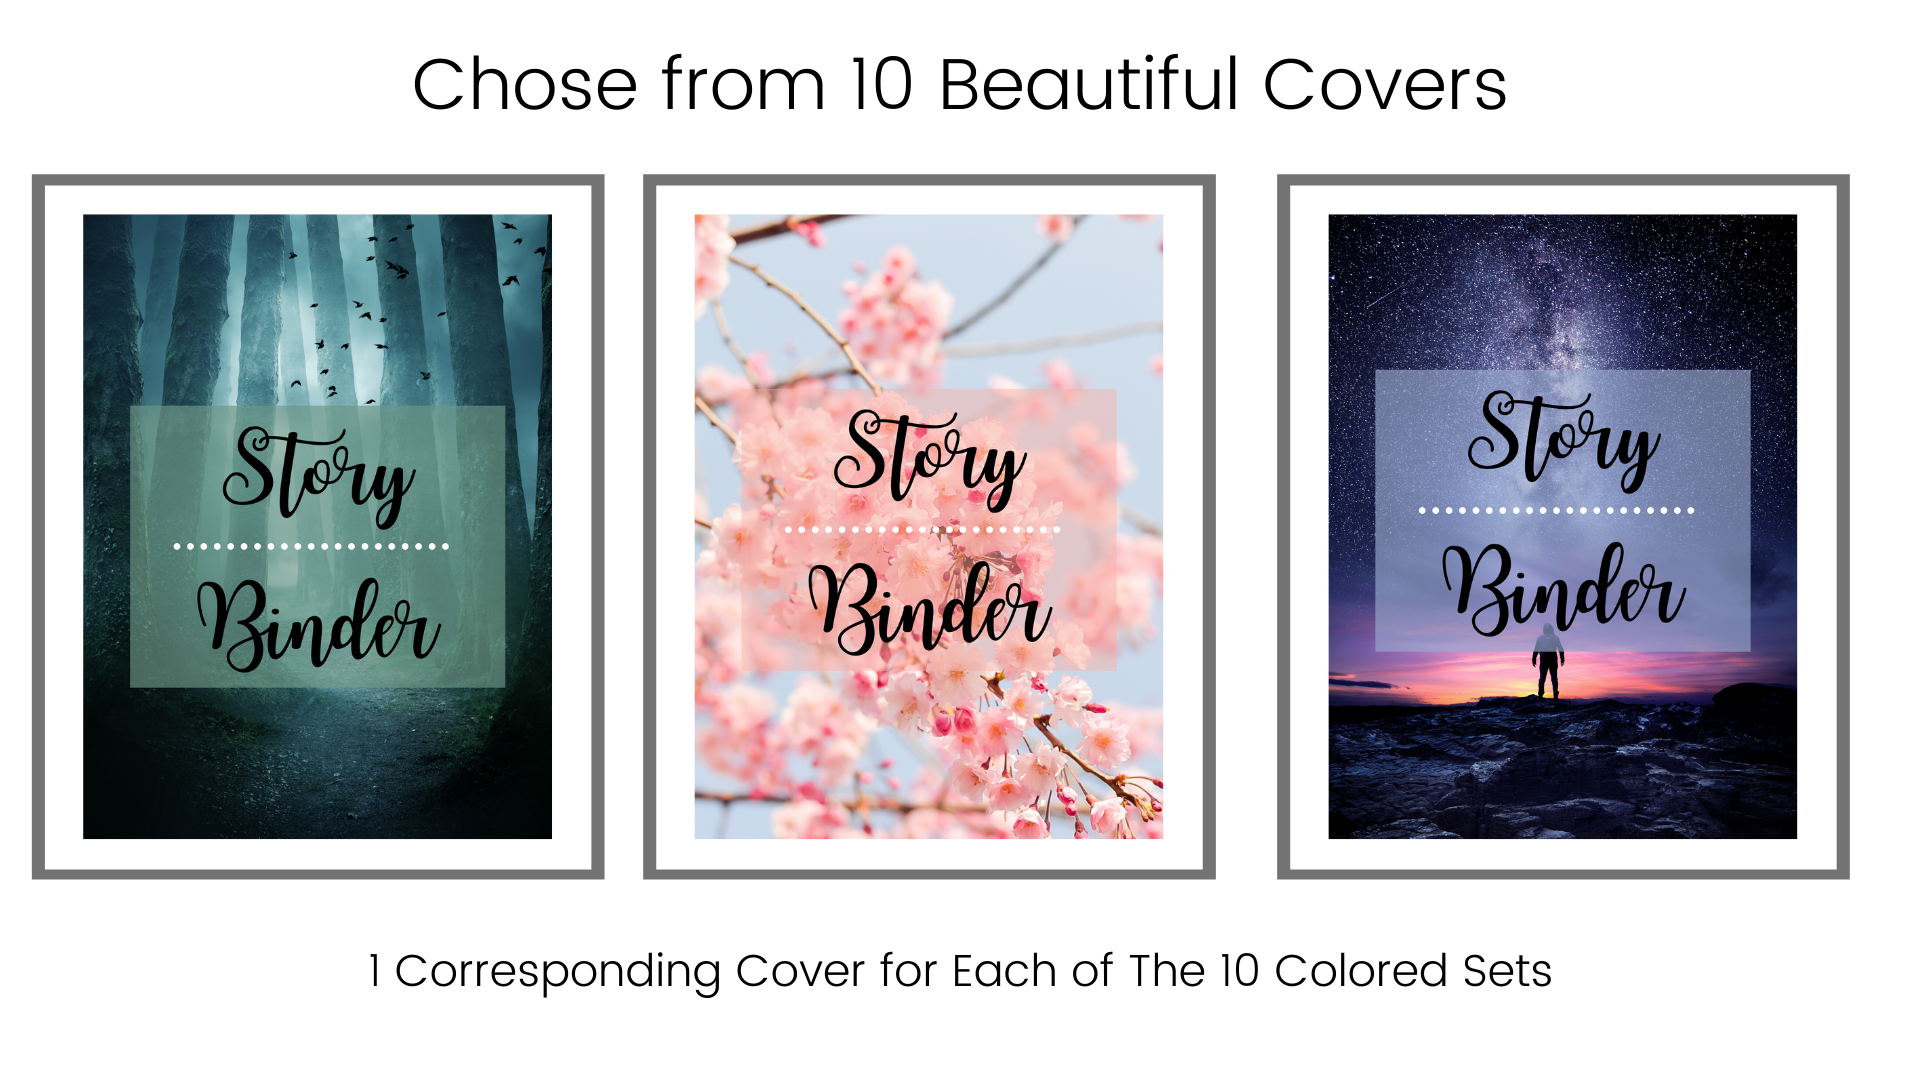
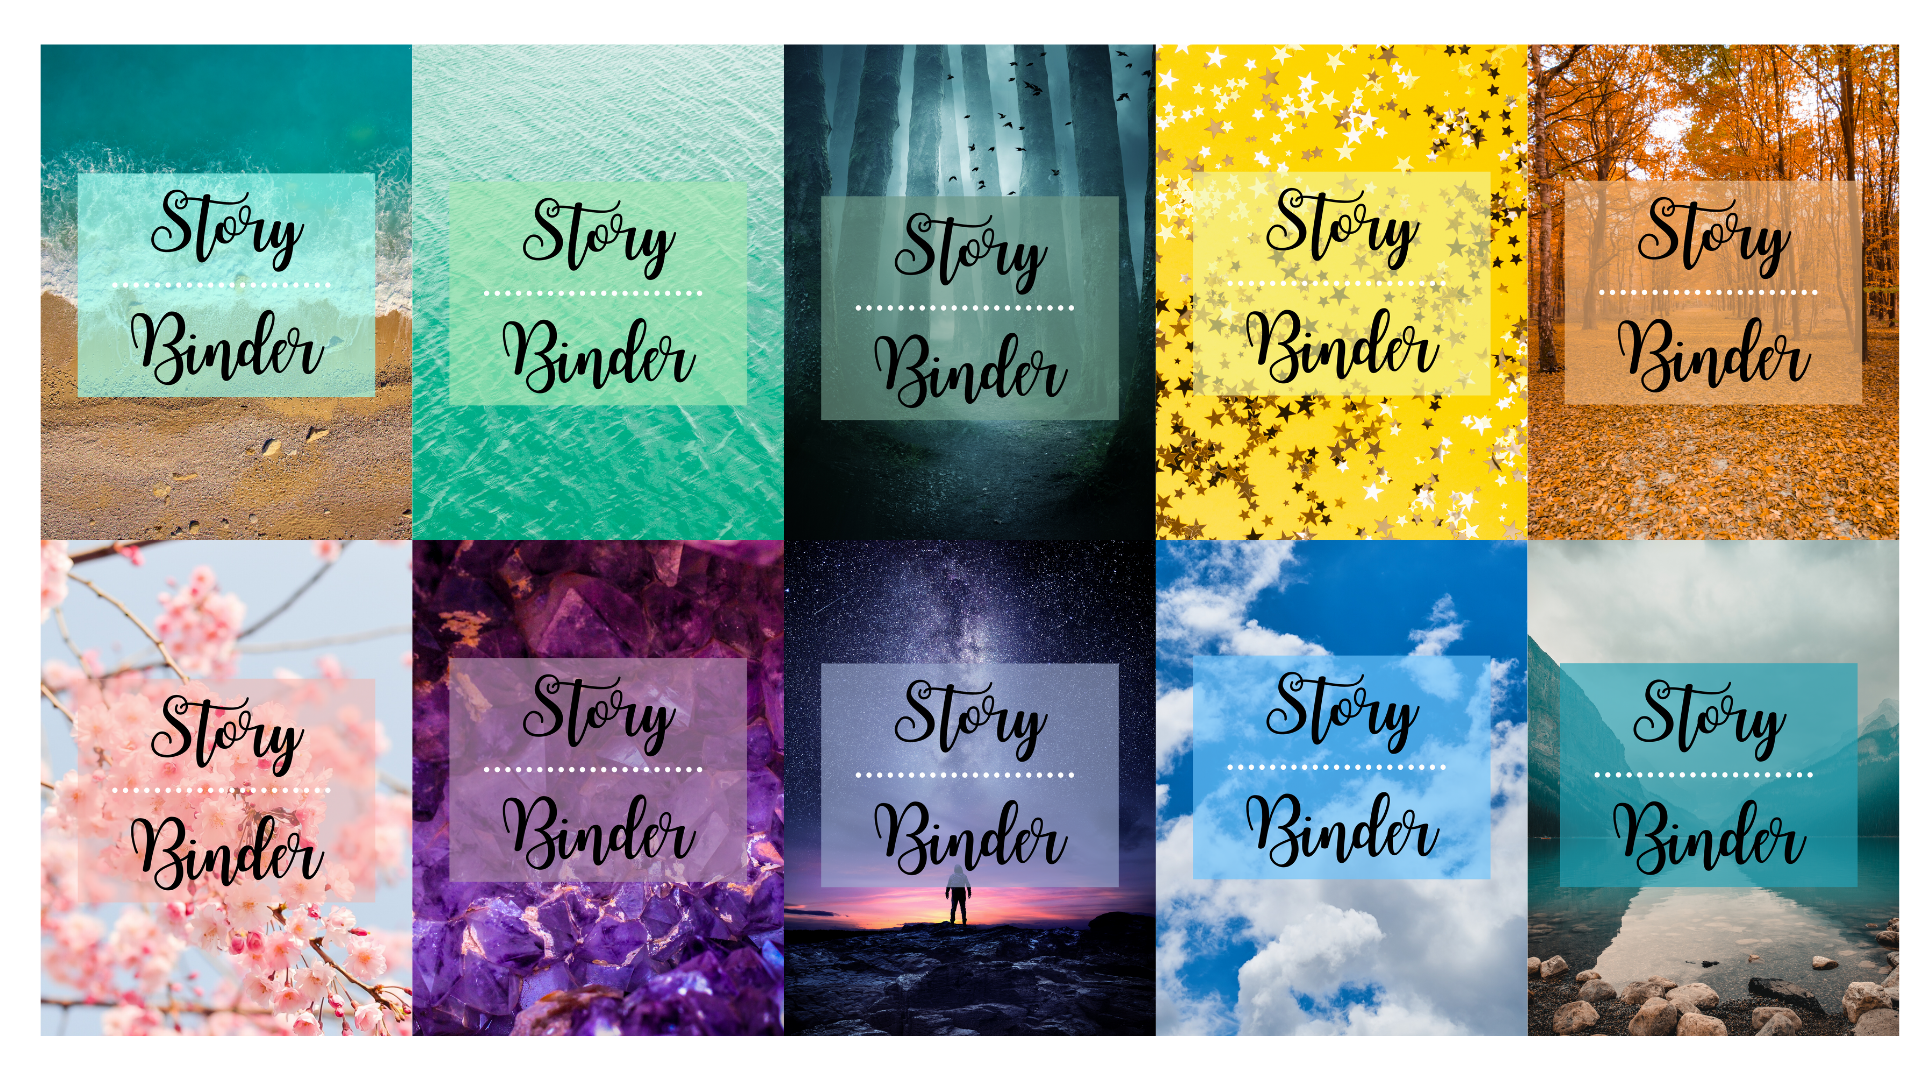
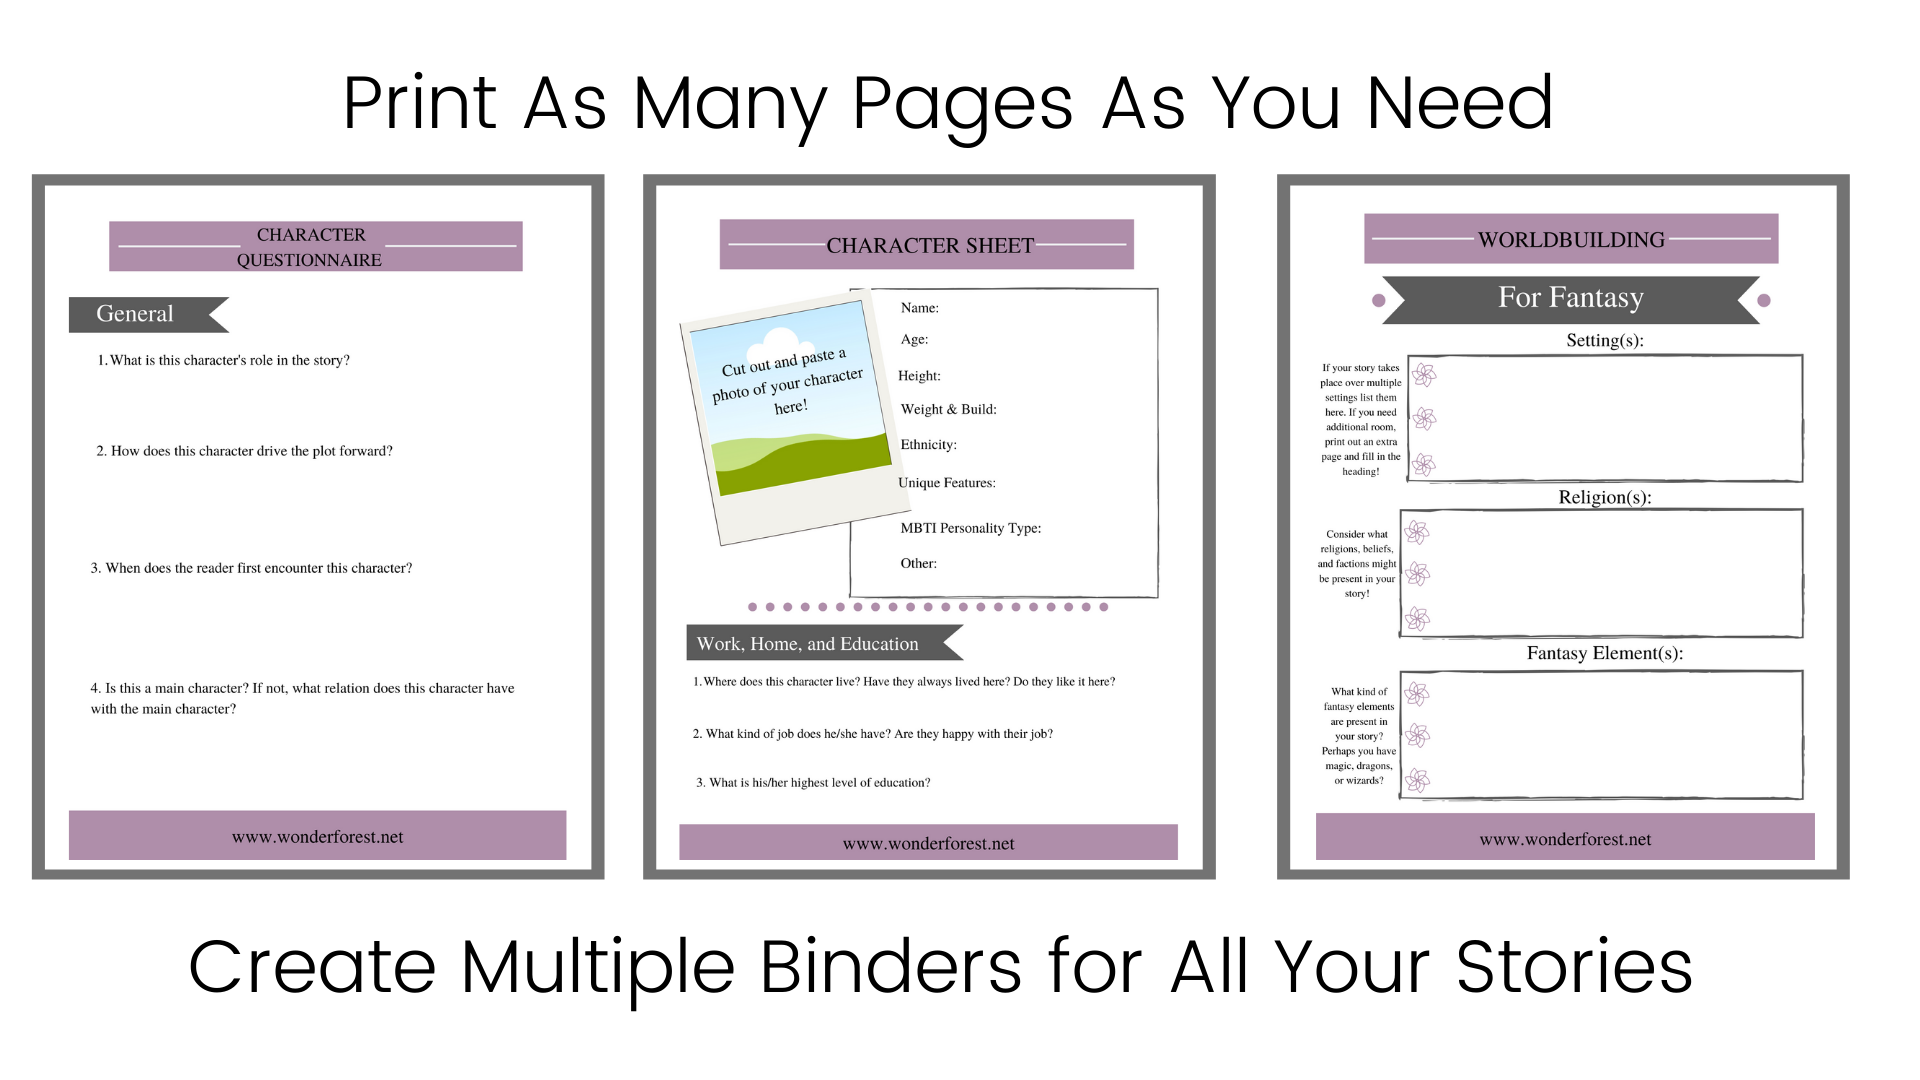

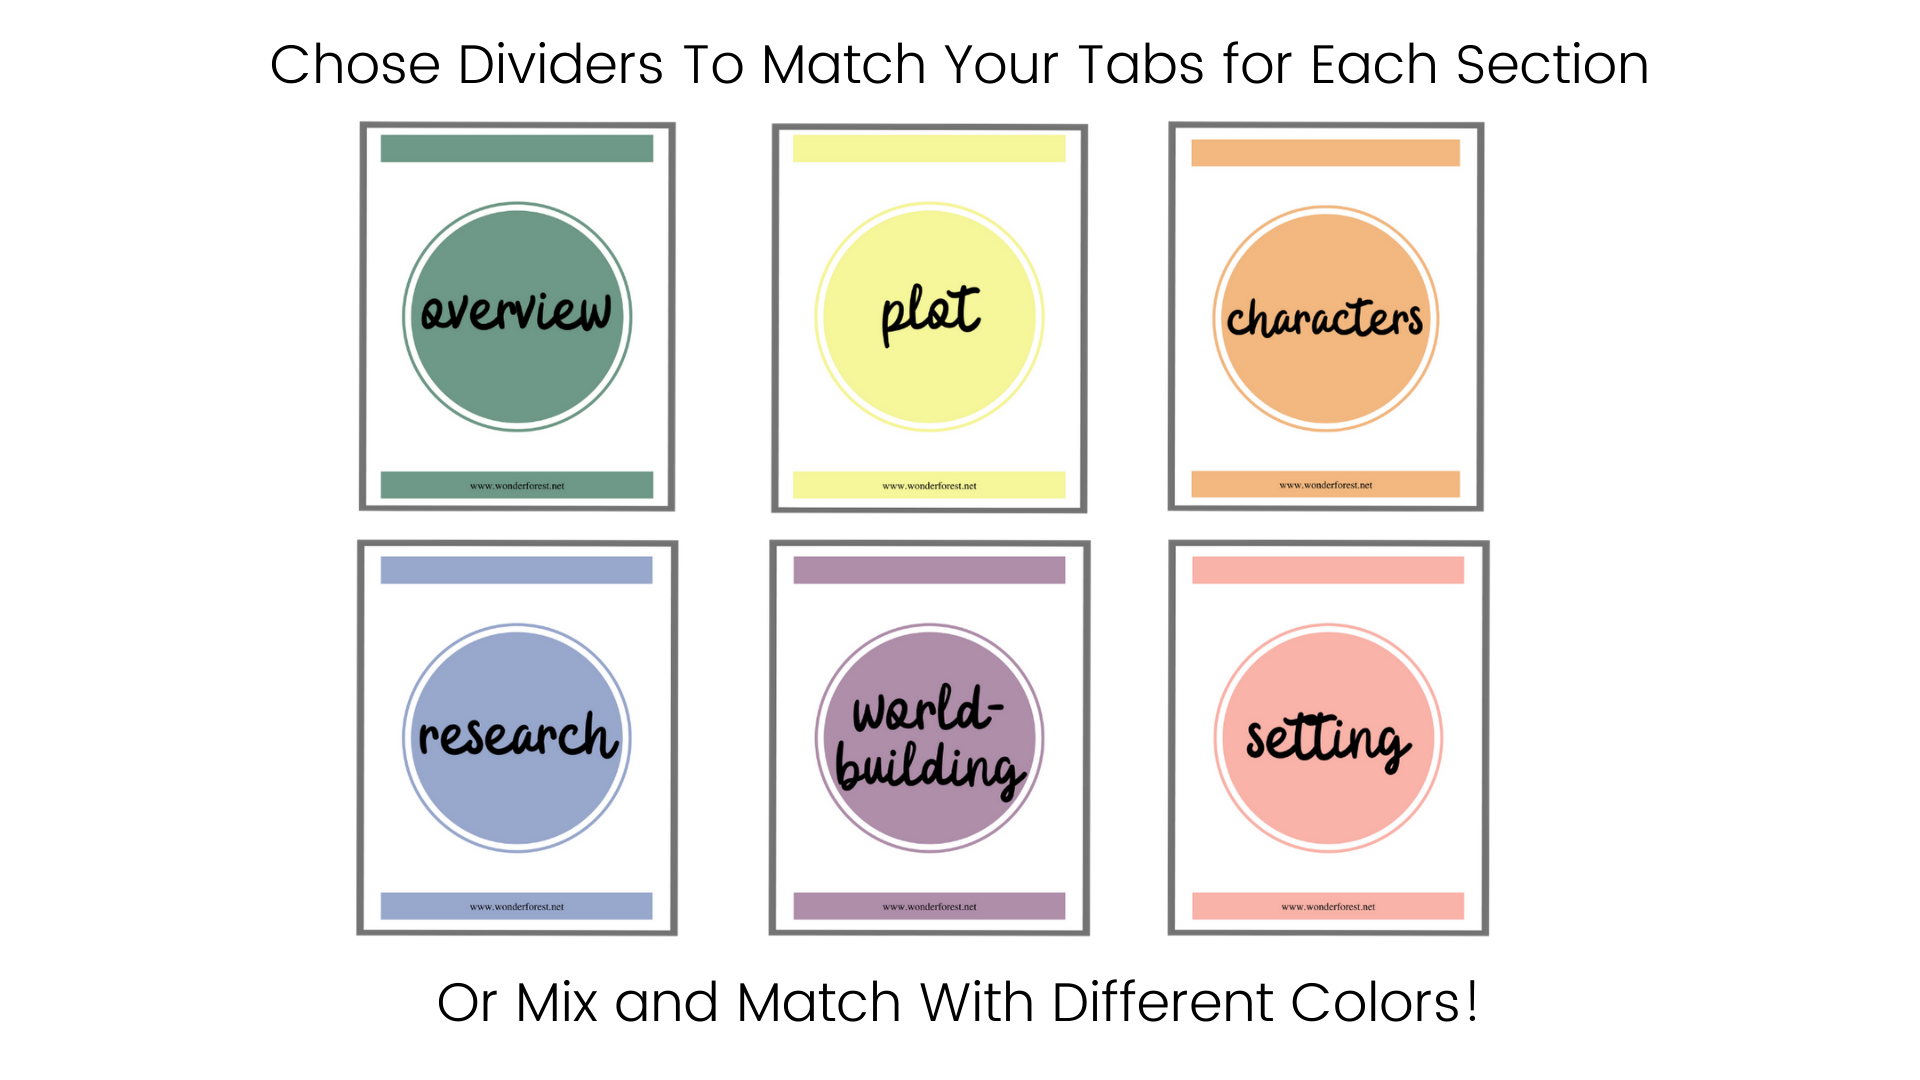
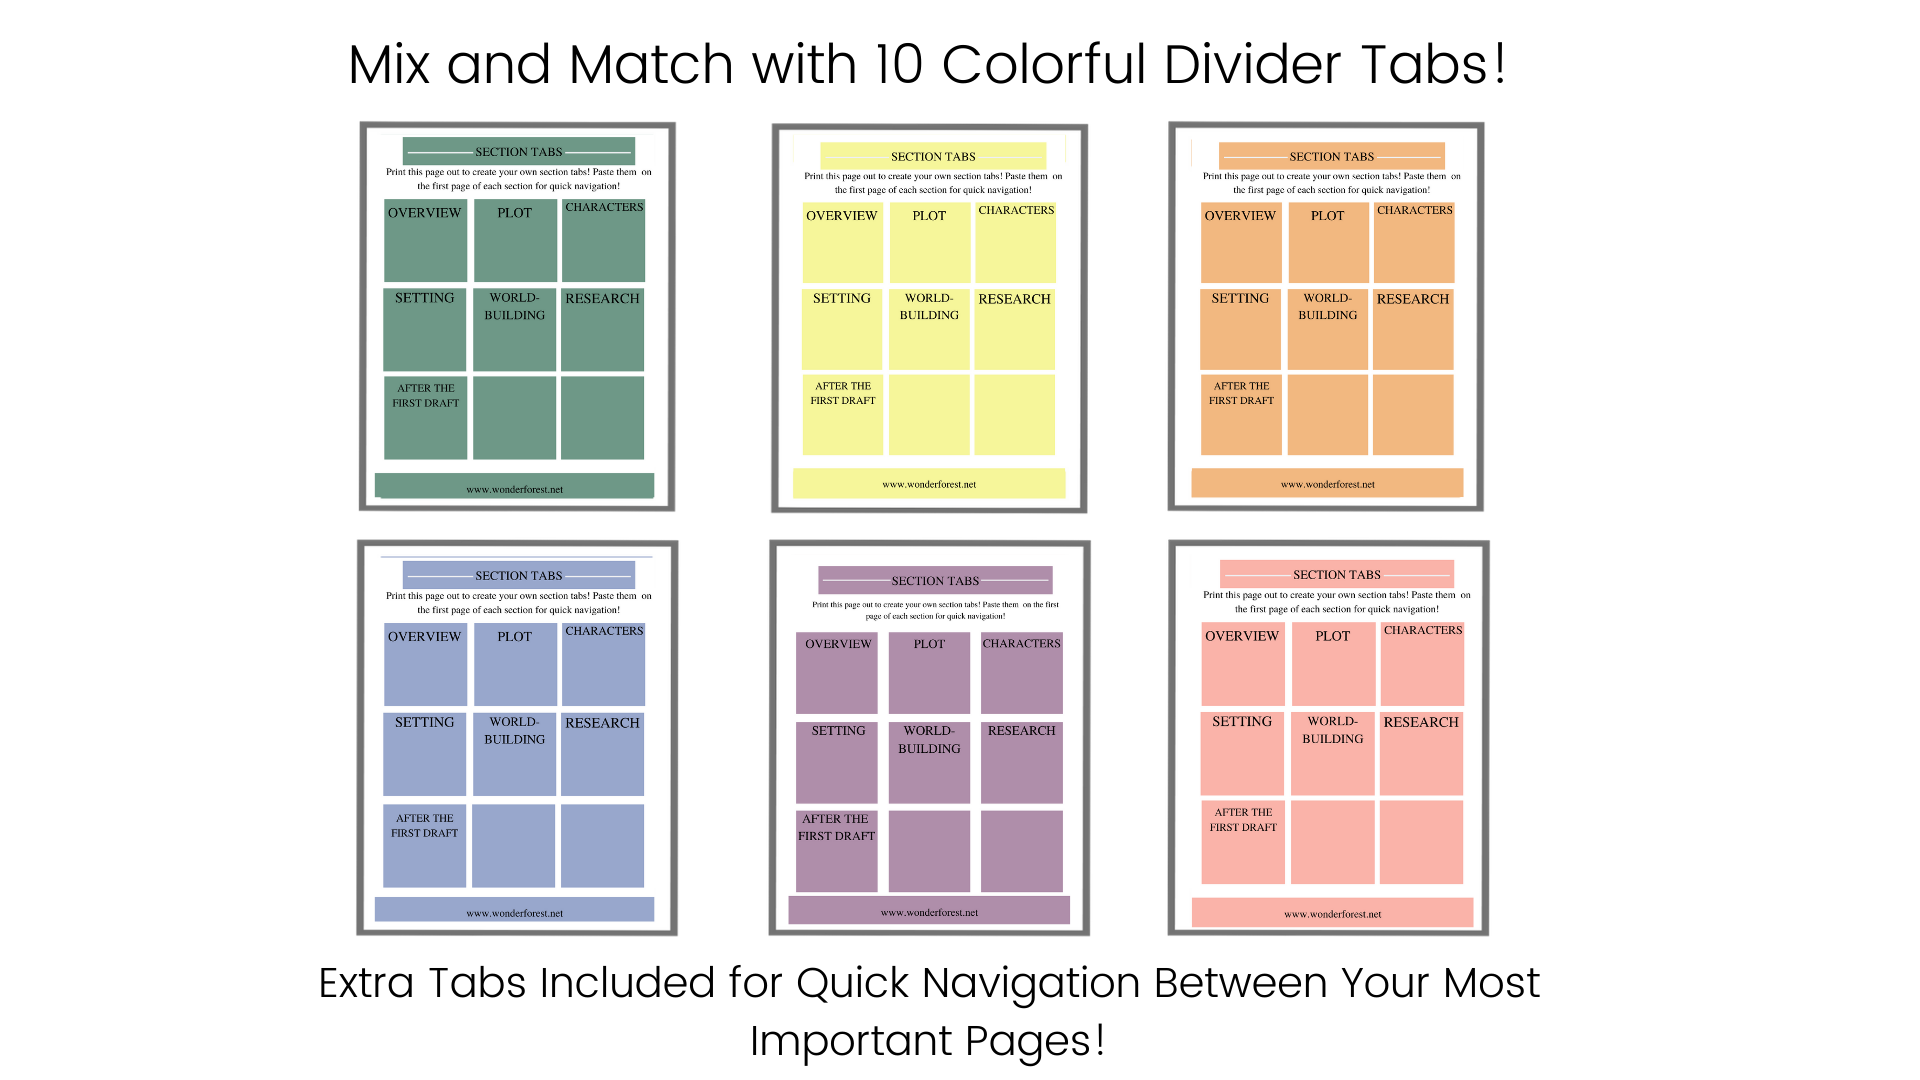
Click here to get your Story Binder Printables!
If you’d like to read a continuation of these tips, check out my blog post, 5 More Tips for Staying organized as a Freelancer!
And that’s it for my 5 tips for staying organized as a writer! What organization methods do you use? Are there any that I haven’t listed here that you just love? Comment below!
Thumbnail photo by Markus Spiske.
—Payton

20 Tips and Tricks for a Successful Email Newsletter
Effective email newsletters should prioritize providing value to subscribers before making calls to action. Maintaining a professional tone, respecting privacy, and avoiding spam are essential. Consistency in sending emails builds trust, while engaging content like behind-the-scenes insights, tips, contests, or case studies can capture interest. Offering free resources or exclusive content encourages subscriptions. Additionally, testing emails for errors and ensuring mobile compatibility enhances credibility. Strategic newsletters can foster loyal audiences and boost conversions.
This blog post was written by a human.Hello readers and writerly friends!
If you’re a returning reader, welcome back and if you’re new to the blog, thanks for stopping by! In this blog post we’re discussing the importance of not only utilizing email newsletters to convert clicks to cash, but also how to use them effectively to build a list of loyal, dedicated, and engaged subscribers. These subscribers should be more than happy to sign up for your newsletter, but they also should want to stay on your emailing list, well beyond receiving their freebies (aka sign-up incentives, which we’ll discuss in detail further on in this post). Newsletter emails should not be just another piece of junk mail to add to the trash pile. If you want your email newsletters to stand out, it’s all about delivering real value to your readers. Think beyond promotions—share helpful tips, interesting stories, or behind-the-scenes updates that people actually want to read. Consistency builds trust, so stick to a regular schedule.
In this post, I’ll go over all the aspects of effective newsletter marketing—such as how to set up an emailing list, building autoresponders and confirmation emails, strategies for developing compelling email campaigns, analyzing and understanding subscriber data with analytics, designing beautiful, mobile-friendly emails that drive traffic back to your website and boosts conversion rates, brainstorming newsletter topic ideas, crafting engaging freebie content that hooks new subscribers, sending test emails before releasing newsletters, and more! I also provide examples of good and bad email newsletters and include a list of resources for you to use when planning and preparing your newsletter email marketing campaigns. I’ve also included a printable checklist for you to pin up on your vision board or add to your marketing notes! In the “Further Reading” at the end of this post, you can find links to all the resources, content creators, and examples mentioned in this post!
Why Do I Need An Email Newsletter?
On paper, an email newsletter is a marketing campaign through which many corporations and entrepreneurs alike contact consumers and convert clicks to cash (okay, enough alliteration, I get it.) But in practice, it’s more complex and incredibly valuable. In the digital age, email marketing can be worth more than striking oil.
An email newsletter is a valuable tool that every entrepreneur, writer, editor or freelancer should have in their toolbox. Newsletters allow you to advertise products and promotions to recipients in ways other advertisements can’t—you can give your readers special VIP access to content, discounts, and so much more. But there’s more to it than copying and pasting your most recent blog post into your email box. No—that’s how you get readers to unsubscribe, real quick. It takes some doing, but newsletter campaigns are an important and valuable way to connect with your audience. When I send out emails to my subscribers, they’re getting content they won’t find anywhere else. There are some things to know before you jump off in the deep end of launching your first email marketing campaign, so keep reading to learn more!
Things To Keep In Mind
I always say authors should treat email newsletters like love letters, only not quite so romantic. You want them to be beautiful and actionable and you don’t want them to end up in the trash. Follow these basic guidelines as well as the extra mile tips to ensure your specially crafted newsletter translates to sales.
Respect your subscribers’ privacy. There is nothing more annoying than getting emails you didn’t sign up for. Of course, coming by someone’s email isn’t always easy, which is why getting them to subscribe in the first place is the biggest hurdle here. But you should always be considerate of the fact that they agreed to subscribe to your email list on the promise that you will deliver relevant, useful content and use their email for nothing else.
Don’t spam subscribers. Okay, maybe I lied before—the only thing more annoying than receiving emails you didn’t sign up for is getting your email inbox blown up. The number one reason I unsubscribe from an email list is when I get tons of irrelevant, non-useful, annoying emails. Subscribers don’t need to be updated 24/7 and you should be too busy to be sending out multiple emails a week anyways. If you need anymore convincing, its illegal to spam someone’s inbox, so at the very least, out of self-preservation, heed this advice: don’t spam.
Be professional, even if you’re not one (yet). When it comes to email newsletters, you can get comfortable and friendly with subscribers, but be professional. You never want to send out unfinished, unbranded, unedited, or remotely incomplete emails. Additionally, typos, broken links, and content movement is inevitable. To avoid this, send out a test email. Test all the links, read your email carefully, and ensure it translates correctly to mobile. I always send my email campaigns out on my secondary, personal email account. This way, I can see exactly what my subscribers see.
Be consistent. Subscribers are kind of funny in that they want routine, normalcy, and consistency in the content they consume. That’s exactly why YouTubers have upload schedules and TV channels air certain shows at the same time every week. This is important because when you reach out to your audience consistently, you build trust and recognizability with your audience and drive traffic to your site on a regular basis.
Add value first, then call to action. This might be the single most important tip in this entire blog post, so if you take away anything at all, please, dear reader, let it be this. I always tell my clients that the single best way to separate yourself from the competition is to add value first, then call to action later. What do I mean by that? Don’t expect your audience to do anything for you if you can’t provide them with plenty of useful, knowledgeable, or actionable advice beforehand. You wouldn’t subscribe to a YouTube channel without first knowing that you either a) enjoy the personality/humor of the YouTuber for entertainment or b) have found their channel is loaded with helpful, actionable advice, tips, tricks that are relevant to you.
This is no different for your subscribers. The easiest way to achieve this is to think of your experience, knowledge, and findings as your product. As an online content creator, generosity first is always the way to go. By providing value to your subscribers, first, you’re essentially giving them a sample of the widely helpful content found all over your website and other social media platforms. Think of the value first approach as the sample lady at Costco. She’s the best, right? We love you, sample lady. Anyways, she is doing exactly what you should be doing and that’s providing you with value you first, so you’ll come back for more, later. Too bad you can’t come back for seconds of the samples. But if your content is truly helpful and relevant to the reader, they’ll be more than happy to subscribe—or as far as our analogy goes—pick up the full-size product.
So how do you do this? Consider using freebies—free, downloadable content that is filled with useful, actionable advice, field hacks, or exclusive content. Amy Landino entices readers (and listeners of her podcast) to sign up to newsletters by offering her list of seven tips for going after the life you want. Shayla Raquel does the same by offering her Pre-Publishing checklist via email for all new subscribers. Jorden Makelle, from Creative Revolt, offers instant access to her free marketing class for freelance writers upon subscription. As a copyeditor, I offer my Story Binder Printables Packet to my potential subscribers because most people that end up on my site are writers and content creators. See? if you offer useful, actionable, irresistible content you subscribers will gladly give you their email for access to it.
Don’t repost your blog post in your newsletter. You’ll see way more about this as you scroll down, trust me. But if you make peace with it now, then you can laugh at all the times I included it in this blog post. (Some people just don’t get it, what else could I do?)🤷
Okay, now that you know the basics, lets talk about some of the creative, more exciting aspects of email marketing.
What Kind Of Content Should I Include In My Emails?
As a book editor, and fantasy writer, it’s unsurprising that most of these topics will revolve around the publishing world, but they’re relevant to any content creator.
First and foremost, do not just dump your entire most recent blog post in your newsletter. Just don’t. You can include an excerpt or snippet of the blog post to get subscribers to your blog where they can read the full story. Copying and pasting the entire blog post into your email newsletter is a great way to not deliver on your promise to provide an incentive for readers to subscribe. If they can just read the whole blog post online, what reason would they have to subscribe to your newsletter if it’s just going to end up in their inbox, where potentially hundreds of other unread newsletters go to die. Save the blog post copy for the blog and offer unique, valuable content in your newsletters instead. I’ve included examples of what not to do when it comes to teasing blog post content in emails further on in this post.
Add anything that adds value to your emails and shows off your personality!
Advanced reader book copies (ARCs)
Behind-the-scenes as a writer/content creator
Best tips and tricks that go with your content’s topics/message
Book reviews or featured books (products related to your niche are great)
Case studies that demonstrate how your information or service has helped someone
Contests/giveaways
Checklists
Deleted scenes and alternate endings to your book (content creators that aren’t in publishing, you can send bloopers or reject photos from your camera roll that just didn’t quite make it to Instagram)
Events
Exclusive Email-only discounts
Free, downloadable resources
First book in your series (this is great when you have the series already completed)
First chapter in your book (be sure you have formatted as a PDF, mobi, and epub)
Helpful printables (character sheets, NaNoWriMo kits, budgets, planners, calendars, bucket lists)
Hobbies and other interests (inside looks such as photos, videos, and writing that revolves around your hobbies, that might not be as well known on your website or social media)
Inside looks and updates publishing process (budding authors are so eager for these sneak peeks!)
Inside scoop on the research process
Interviews
Launch team invitation
Lists (current favorites, sites, books, podcasts, tools, software)
Motivational or inspirational advice that applies to your field
Photos of people and places that inspired your book
Playlists for your books (Abbie Emmons and tons of other writers do this to get in the right headspace for writing, but readers love getting inside looks into the process—and content around your novel, published by you is canon!)
Printable poster (Natalie Brenner did this with preorders)
Printable Christmas Ornaments (The Chicago Graham School did this with their Chicago Manual of Style)
Round-up of most popular blog posts (fan favorites)
Sneak peeks (book cover, teasers, excerpts)
Upcoming events/book signings/readings/Facebook Live events
Videos
Video series (Amy Landino does this with her Secret Podcast on her Patreon)
Your story (how you first got into writing, what inspired your recent book)
My “Free Edit Giveaway” Email Newsletter

A screenshot of the greeting and body sections of my “Free Edit Giveaway” email newsletter from 2019. Photo by Payton Hayes.
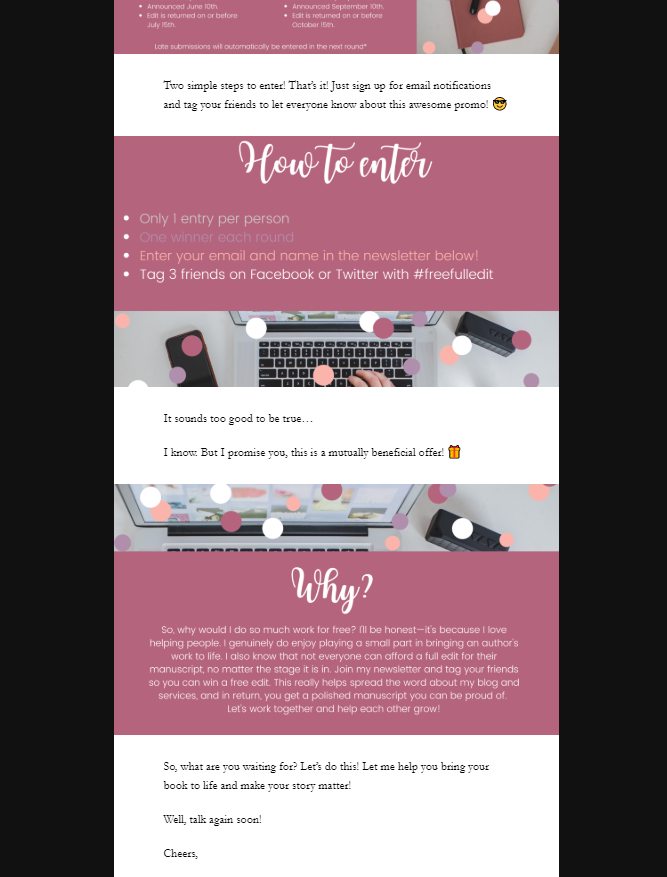
A screenshot of the body section of my “Free Edit Giveaway” email newsletter from 2019. Photo by Payton Hayes.

A screenshot of the body and footer sections of my “Free Edit Giveaway” email newsletter from 2019. Photo by Payton Hayes.
Alright, now that you not only know the basics, but you’ve got a pretty good idea of the kind of value you can deliver straight to your subscribers’ inbox, but how do you actually set up a newsletter campaign? Do you just send emails manually? Yikes!
Of course, it’s not that labor intensive, but it will take some work beforehand. Once you’re all set up, you can mass send emails regularly, like a pro! You can even automate emails to send out your freebies, confirm subscriber sign-ups, and unsubscribe emails, and more! I’ve organized the following sections into two lists—the first explaining how to set up the email campaign and the second that shows you simple, easy-to-execute ways to go the extra mile and stand out from competition.
How To Set Up An Email Newsletter
Step One: Buy a domain name email address. It’s likely if you’re reading this that you already have a website and that’s how subscribers are signing up for your email list, but if that’s not the case, I want to know your secret! Also, you’re going to need a domain name and email address. Gmail and other email services don’t like it when email newsletters come from third-parties without a domain email address. These email platforms are much nicer to you when your third-party emails come from a domain email address. When using online marketing tactics, the path of least resistance is always your friend. In fact, back when I used wonderforestofficial@gmail.com Gmail would hide my email newsletters in spam folders. That is definitely not the goal here, so to make sure your special, handcrafted email newsletter doesn’t get thrown in the trash, use a domain email address. Purchase your domain email address from Google Domains and add the new address to the settings in your third-party email server.
Once that’s done, be sure to verify and authenticate your domain. Email authentication improves deliverability. It’s a sender identification tool that helps keep your emails out of subscribers’ spam folders. Think of it as shiny, metal name pin (as opposed to a sticker nametag). If there’s a second major takeaway from this blog post, it’s that you really, really need to verify your domain.
Step Two: Pick a campaign manager. If you use Squarespace, it might make more sense to use their built-in email campaign interface because it’s easier to work with but it can be quite limited with some elements. It currently does not support code injection, social icons, or file attachments. On the other hand, Squarespace email campaigns work seamlessly with your website.
Alternatively, you could use Mailchimp or another email campaign manager. These two are the most popular, but it’s totally up to you. Mailchimp is a little unconventional but it has a lot of capabilities.
Both of these options (and most others out there) offer free accounts with basic capabilities as well as different tiers for paid accounts with all sorts of additional features. Please note, automated emails are free with Mailchimp. Automated emails through Squarespace require you to purchase the $14/month plan. Free or trial accounts with both platforms do not allow you to hide their branding (the Squarespace or Mailchimp logos will be at the bottom of your emails).

A screenshot of Mailchimp’s logo in the footer of their free plan option. Photo by Payton Hayes.

A screenshot of Squarespace’s branding in the footer of plans starting at $14 and under. Photo by Payton Hayes.
I have used Mailchimp, but currently, I use the Squarespace email campaign manager, so most of the tips in this guide will be for these two services. I won’t go too in-depth with the features, but I’ll include links to the respective guides.

A screenshot of my social sharing image that pops up when my website URL is linked on other websites and social media platforms. Photo by Payton Hayes.
Step Three: Enable social sharing images (Squarespace) or social cards (Mailchimp). Social cards allow people to show off an image, headline, and short description when they share your newsletter on social media. I’ve included a photo of a Facebook social card for my website so you can get an idea. Not only does this ensure the link back to your newsletter look professional, but it adds to the overall consistency of your brand and makes your newsletter look uniform with the rest of your branding. You can find a guide for adding social sharing images in Squarespace or social cards in MailChimp in the “Further Reading” section at the end of this blog post.
Step Four: Add click-to-tweet features to your newsletters. Your true, passionate readers want to help you, so make it convenient for them. Like I said earlier, the path of least resistance is key. If you say something inspirational or encouraging in your newsletter, then write it again in a bigger font and hyperlink it with the click-to-tweet link. Additionally, anything that is particularly clever or funny is gold for click-to-tweet links because readers are more likely to retweet something they found striking. Be sure to add your Twitter handle, the line of text you want tweeted, and the link for your current email newsletter and bam—easy, autonomous marketing! And the subscriber is none the wiser.
Step Five: Set up autoresponders. An autoresponder sends an email series after the subscriber has been put on your email list. Autoresponders go out even when you’re sleeping! Note that this is different a campaign. Set up a series to tell the reader more about you and give them that value (freebie) they willingly signed up for. Chances are, if they signed up, they already read something of yours they enjoyed and would like to learn more about you. Set it up so that it sends a couple of emails out over the following week to keep you fresh in the reader’s mind and build on that relationship.
Step Six: Create a promotional pop-up or cover/landing page and an opt-in page. The promotional pop-up is a dialogue box that pops up when users enter your site. The cover page is a simple one-page website that is connected to your site and acts as a flashing arrow to your newsletter. Be careful with the pop-up though, because it there is too much going on or if it’s too hard to get past it, subscribers will give up and leave. Whichever you go with, on your website, create an opt-in page where the entire emphasis is on signing up for your emails. By making it a page instead of just a newsletter block, you can easily add the link to Instagram or use it in Facebook groups. I always suggest this because it is much prettier and simpler than a) an ugly MailChimp link or b) saying, “Just go to my website, and on the home page, on the right-hand side, scroll down halfway. . .”
No—just no. Keep it simple, beautiful, and mobile-friendly. Redirecting new subscribers to your personal Facebook group allows you to engage with them better and form stronger relationships. One of my clients has a Facebook page set up for her book, where readers are directed so they can connect and share their thoughts on the novel. She often engages with her subscribers there and thus builds stronger relationships with them, not only as a writer, but as a person.
Step Seven: Deliver on your promise. If your subscribers gave you their oh-so-valuable email address on the promise that you would give them some kind of freebie, then you better deliver. I unsubscribe so fast from email marketing that is just there to make a quick buck and doesn’t deliver. If you say you’re going to give me the first few chapters of your book, then link several versions of it. If you say you’re going to give me a free e-guide, the download link better be there.
Like I mentioned earlier, Squarespace currently doesn’t allow code injection or file attachments to their emails. I get around this by including links in the email, to a secret landing page where subscribers can download their freebies in various formats.

A screenshot of a section in my newsletter where readers could click a button that would take them to a landing page where they could download the freebie in various formats. Photo by Payton Hayes.

A screenshot of a section in my newsletter where readers could click a button that would take them to a landing page where they could download the freebie in various formats. Photo by Payton Hayes.
See? For my freebie, the Consistent Writer’s Checklist, I offered four formats to chose from. And in my automated email, I provided subscribers with a link to the landing page where they could download the packet various formats. I also clearly explained why my subscribers had to make so many clicks to reach the download, but hopefully Squarespace will support file attachments and code injection in emails in the future.
Make Your Newsletter Emails Stand Out

Use your name in the from field and the subscriber’s name in the email header. If you’re using your own publishing, website, or blog name, you might have more luck getting subscribers to open the email switching to your name (or for some authors, your pseudonym). I made that switch earlier in 2019, and it increased my open rate when subscribers saw emails coming from “Payton Hayes” rather than my company name, “Wonderforest.” This also made the transition from “Wonderforest” to “Payton Hayes Writing & Editing Services” much easier and more natural when I rebranded my business website and socials in 2022.
To address the subscriber by name in Squarespace, go into your email campaigns manager and begin a new email campaign. You can design it as you like, but for the purposes of this guide, I am going to assume you wrote “Hi,” at the top of the email. Follow “Hi” with an open curly bracket or “{“ to reveal a drop-down list of options. Squarespace has coded this so that your newsletter automatically pulls names from your mailing list and inserts them straight into your email.
Additionally, you can add a substitute name to call your subscribers if you already have a running list with subs that somehow didn’t add their name in the name field of your newsletter form. This way, it still has a personal touch. My default name value is “Writerly Friend” and this is particularly helpful for the subscribers that joined my mailing list before I set my newsletter sign-ups to require a first and last name from new subscribers.
To set the From Field as your name, open the email campaign > go to the “Email” tab> “Sender Profile” >and create a sender profile if you don’t already have one. Make sure your name is in the “Sender Name” field. When creating a new Squarespace campaign, simply type an open curly bracket or a “{“ (without the quotes) and a drop-down menu will appear. If you’re using Mailchimp, when you’re creating a new campaign, select the “Personalize the “To” field” option to personalize the email by adding subscribers’ names to the header.

A screenshot showing how to personalize recipients’ names in emails when using Squarespace Email Campaigns. Photo by Payton Hayes.
A screenshot showing how to personalize recipients’ names in emails when using Mailchimp. Photo by Payton Hayes.
If you use Squarespace campaigns, I highly suggest you add a secondary email to your newsletter list so you can clearly see what it looks like as a subscriber, since any email you send to your main email (that either sends owns the domain OR sends the newsletter out) will always say, “[Test Email]” in the subject line and and may not format the subscriber names correctly.
![Email campaigns sent to your website’s main email, domain owner, or the email you sent the campaign with will always say “[Test Email]” in the subject line.](https://images.squarespace-cdn.com/content/v1/5c92d965a9ab955029034689/1579268121304-DSWQA2UNLY85C7UM3P6M/test.png)
Email campaigns sent to your website’s main email, domain owner, or the email you sent the campaign with will always say “[Test Email]” in the subject line.

As you can see, subscriber the subscriber name (or in this case, my name) was not automatically ported into the name field. Instead, it defaulted to my back-up name, “writerly friend”.
What it looks like on your end:

A screenshot of my email greeting default value, “Writerly Friend” for subscribers that joined before my newsletter sign-up required full names. Photo by Payton Hayes.
What it looks like to your subscribers:

A screenshot of my personalized email greeting, that addresses subscribers by their first and last names. Photo by Payton Hayes.
Spend time on your headline. This is where my experience in journalistic writing is so handy, because as a journalist, the fastest way to grab or lose a reader’s attention is in the headline. However, you should keep in mind that certain words or phrases in email headlines automatically trigger emails and send them straight to spam—like “free,” “call now,” or “bonus”. Most modern email services are designed to help eliminate spam emails and there are so many things to be mindful of to ensure your newsletter doesn’t end up in the wrong folder.
If you’re following the rules in this blog post, you’re sure to land it in the inbox, every time. For more reading on designing inbox-safe, compelling headlines, CopyBlogger has a fantastic guide. Another way to stand out (especially to millennials and younger readers) in your headlines, is using emojis or emoticons! I prefer the surprised face, the crying-laughing emoji, and the explosion emoji because they’re interesting, funny, and relatable. 😲 💥 😂 For the headline guide from Copyblogger check out the “Further Reading” section at the end of this blog post.
Add a short bio and photo. Just because someone subscribed once, (and likely just to get access to the freebies, let’s be real) doesn’t mean they always remember who they subscribed to. It’s nice to remind them who you are. This also helps subscribers build trust with your brand because not only are they getting to know a little bit about you along with the content, they are putting a face with the name and the brand. See how I introduced myself, directed them to my other sites, and told them what to expect from my newsletter and other social media? Do this to make your emails more personal and to help your readers put and keep a name with the face.

A screenshot of the end of my newsletter with my email signature image. Photo by Payton Hayes.
Speaking of which, you can also include a small profile picture or your signature to your email. I do not recommend using your real legal signature. Instead, use your author, artist, influencer, or business signature. Alternatively, you can create a custom email signature in Canva, like I did. In real life, I sign my documents with a little star, so I tried to keep that personality with the heart sticker I added to my email signature. For an email signature, I recommend using a typeface that looks like handwriting because it feels more personalized and adds a little extra flair. The typefaces below the “Artist Script” (left) and “Something Script” (right) are great examples of typefaces that resemble handwriting. These two typefaces are both available with a Canva Pro membership.
If you already have a signature design you’d like to use with your own handwriting, you can either sketch it out with a drawing tablet, or go old-fashioned by writing it out on a piece of paper and photo-copying it. I personally prefer creating logos and signatures with Canva because they’re vector-based images that can be edited without compromising the quality of the image. I am neither affiliated with Canva, no do I receive any kind of payment for promoting their platform. I have created over two-hundred flyers, graphics, and images with Canva and I use it for almost every project. You can find links to Canva and a helpful article about vector images in the “Further Reading Section” at the end of this post.

A screenshot of the signature I made using the “Artist Script” typeface which is available with a Canva Pro membership. Photo by Payton Hayes.

A screenshot of the signature I made using the “Something Script” typeface which is available with a Canva Pro membership. Photo by Payton Hayes.
Keep design elements consistent and cohesive. As you can see (from this post and all other posts on my blog), I use my email signature image as a sign-off at the end of every blog post. This keeps it consistent across my posts and emails so that my content is uniform, familiar, and personalized. Much like using a logo, this signature image helps my readers remember me and my website. It’s a seemingly small detail with a massive impact. Keeping design elements and branding the same across your social media and other online platforms creates reliability and builds trust amongst your subscribers. So whether you decide to include a signature, logo, or both (I use both), keep it consistent with your other branding elements and carry it across all platforms and profiles.
Be a person first and a sale, second. Just because all the big creators are pushing book sales 24/7 doesn’t mean you have to. Thankfully, there are still some big authors who don’t do this. You’ll do a much better job of selling your products/services if you establish a relationship with your readers—not hound them to click the buy button. I’ll say it again for those in the back, action first, value later. Hey, maybe I should make that into a click-to-tweet for this blog post!
Don’t give people a reason to unsubscribe. In fact, make it nearly impossible for them to want to do this. If your headline tells them they’re going to get a free download, then make sure the free, downloadable content is there. Additionally, if you're emailing them constantly, it's going to get old quick. Same goes for using click bait—you’ll probably have some angry subscribers. Send every email with intention and think before doing it. Ask yourself, "Would this make me unsubscribe?"
Segment your email newsletter list. Emails are not one-size-fits-all. Certain emails will be better suited for your loyal subscribers and others might be better for the new subscribers. Set up one set of emails for the true fans and another set for the newbies. Additionally, segmented lists are useful in getting rid of subscribers who never read your emails.
Add your socials. Include links to your other social media accounts (with the proper branding), follow and share buttons to your newsletter. Don’t arrange them too close together because you’ll have too many call-to-actions in one spot. I like to keep my follow buttons at the top beneath me logo, and my share buttons at the end of the email. Like I mentioned earlier, Squarespace doesn’t offer this feature yet, so I just use good, old-fashioned links. I only link to the sites I have linked on my website (Facebook, Instagram, Twitter, YouTube, Goodreads) in my emails, but you can add as many as you like! Just don’t let it get cluttered.
Pro tip: For adding links to a Squarespace email, use line breaks, or “|” between links to keep everything separate and orderly.

A screenshot of the social links at the bottom of my website. Photo by Payton Hayes.

A screenshot of the social links at the bottom of my emails. Photo by Payton Hayes.
See? Not only keeping consistency via the social links I include, but also with my witty coffee comments!
Keep a close eye on un-subscribers and spam complaints. Don’t get too hung up on anyone that unsubscribes from your email list. It’s not a big deal, because you don’t want them on your list anyway if they aren’t reading the emails. Trust me, you don’t—numbers don’t matter if they don’t care. But if you get several unsubscribes after one certain email, then you might want to pay attention. Did you do anything that might’ve caused so many people to opt out?
As far as abuse complaints are concerned, that shouldn’t be happening unless you’ve opted them in without their permission, purchased lists, or hidden your opt-out link. These are all important parts of being a respectful newsletter email-er. Your opt-out link should be easy to find—either at the top or bottom of the email, in a normal, nondescript font. As far as willfully opting people into your newsletter list goes, Just. Don’t. Do. It. Seriously. It’s as bad as buying followers on Instagram—it complicates data and fills your subscriber list with a poor representation of your audience.
Unsubscribe people who do not read your emails. One of Shayla Raquel’s most effective campaigns was when she sent an email out asking a segmented list if they still wanted to write a book. “This would prompt them to either unsubscribe or respond to me. Once they responded, I asked them how I could help, which meant they were engaging again.” she said. Like I said previously, do not keep people on your list if they never read your emails. It skews your analytics. Either re-engage them or unsubscribe them—it’s as simple as that. Check out Shayla’s blog in the “Related Topics section at the end of this post!
Track your analytics. So why were the previous two sections so worried about skewing the data? That brings me to my final tip for sending effective email newsletters and that’s to keep track of reports to better understand your demographic. Mailchimp and Squarespace both have excellent information on your demographics, which you can then use to adjust your newsletter according. You’ll notice that you have subscribers across the globe, opening your newsletter at different times in different time zones! You can also see exactly what your subscribers are clicking on the most, which will help you narrow the focus of your content. Getting niche is important in the content creation industry because it helps you avoid falling into believing in oversaturation. (I have an entire other blog post on that here. Don’t even get me started.) You’ll begin to have confidence that you’re producing quality content and your subscribers are enjoying what you have to share with them. You can also use this information for other marketing strategies like Facebook ads, which are proven to be effective because of Facebook’s brilliant ability to accurately display relevant advertisements to potential subscribers.
Bonus Information

A screenshot of an email newsletter with almost five pages of blog post text copied into the body of the email. Photo by Payton Hayes.
1. How long should an email newsletter be? What’s the difference between a newsletter and a blog post? Can’t I just repost my blog post in the body of the newsletter? Should I keep the word count to a certain minimum? The truth is there are no hard and fast rules to writing email newsletters and that’s because they are often specific to the creator and the type of content being shared. I would recommend no more than a page and half, depending your topic and message. Use the KISS method—keep it simple, sugar.
Of course, the more relevant value you can add, the better, but don’t overload subscribers. Leave the long-form content to the blog. Look at the photo on the right. As you can see, this email is so long I had to zoom out more than 200% to see the whole email on one screen. That’s just too much. If you really must share that much content, include an email-exclusive download link to a PDF. Don’t forget the freebies!
However, do not, and I repeat: DO NOT REPOST YOUR BLOG POST into your newsletter. Why would I willingly give you my email for something I can find on your blog? The answer is no, I wouldn’t. If there’s somehow a third major takeaway from this post, it’s this: don’t repost content. Instead, you want to deliver irresistible, exclusive, and valuable content to your subscribers’ inboxes. It is okay to notify subscribers of a new blog post this way, but copying and pasting content is just awful. Don’t.👏 Do. 👏 It.👏
2. How often should I send out newsletter emails? Like I said in the section waaaay earlier about spamming, don’t send newsletters out too often. It’s annoying to go from a satisfying Inbox (0) to having a non-empty inbox in a matter of hours, every day. I can already think of a few companies that ruin this satisfaction for me. Now, naturally, I would be thrilled to receive an email from someone I happily subscribed to for valuable content, but the truth is I don’t want emails all the time and neither do your subscribers. If that isn’t enough of a reason—you shouldn’t need or want to create that many newsletter campaigns and that much exclusive content.
3. How can I make my emails sound more human and less like marketing copy? Let me tell you, this is not the time to whip out your clever marketing copy, not even a little. I’ve already touched on this topic in the section of tips for how to set yourself apart from competition, but here’s the main idea: Only you can be yourself, and only you have that uniqueness and advantage. Just carry that notion into your email newsletters. Talk to your subscribers the same way you would to a friend over coffee. Treat your subscribers like the VIPs they are and let them in.
Be your adorable, quirky, nerdy self and gush about the things you love and are passionate about (in my case, that is in fact, coffee and the Chicago Manual of Style) Kevin Kelly talks about having 1,000 true fans—that to be successful, you don’t need millions of followers, you just need 1,000 true fans. Your subscribers are your true fans, number one cheerleaders, and VIP’s so build true, meaningful connections with them.
Newsletter Q&A!
I asked some of my editor and writer friends for questions for this blog post and they came through! Below are some of the most asked questions and my answers to provide you with a little more guidance to email newsletter marketing. Check out the “Further Reading” section at the end of this post if you’d like to stop by any of the Facebook groups mentioned in this section of the post.
“I've struggled with doing a newsletter mainly from a time perspective and what I should talk about in it. So, I would love to see some suggestions on this :D” —Stephen Howard from the Developmental Editor Connectiongroup on Facebook
Above is an actual email I received in my inbox, just the other day. Seriously? There’s like five pages worth of blog post text pasted into this newsletter. You bet I unsubscribed after I got this email. I’d stayed on this creator’s mailing list for entirely way too long and after receiving several similar emails, I realized it was time to take my name off their list. You don’t have time for reading novels in your inbox, and neither do your subscribers. Your newsletter should serve as another lead magnet to pull traffic to your site. Include a snippet of your blog post to grab readers’ attention and provide a “Read More” link to the full post, should they want more. It would be better for the reader to spend more time engaging with content on your website than reading in solitude from their email inbox.
I’ve sort of addressed this in the beginning of the post, but I’ll expand on it. In addition to all the freebies, you should have some text in the newsletter and that will depend on your field, specialization, and personal interests. As an editor and writer with background experience in both art, computer science, and marketing, I have a wide range of topics to explore in both long and short form content. I suggest you explore your field and see what the competition is doing. See how you can do the same but in your own way and with more value.
Additionally, there is not a best frequency to send out emails. I suppose it depends on the type of content and how much you have to share, but I prefer at least once a month, and if I am doing a series or something special on my website, I will send out additional emails as needed. I know some people who send out bi-weekly emails and it’s really just up to you. See what volume of emails works best for your schedule, what makes sense for your content, and what response you get from subscribers so you can adjust accordingly.
I feel like I'd instantly run out of things to say! Also, how to get people interested in signing up for the newsletter if you don't have something to offer in exchange like a downloadable? (Or should you just make sure you've developed some resource you can use to encourage subscribers?) —Laura Elizabeth from the Developmental Editor Connection group on Facebook
I answered this above, but there are millions of topics out there, so I’d suggest exploring the competition in your field and seeing what you can do differently. And yes, you should create something first so you can give your potential subscribers a reason to subscribe. I prefer to set it up so that the item in question arrives by email once they’ve confirmed subscription. I know from personal experience that if you deliver before they confirm their email, then your confirmation email just ends up in the trash.
Why email marketing? Why do I grow my subscriber list? How do I figure out what to write about? What’s the best time of day to send emails? How often should I send emails to customers? —Geoffrey Andaria Shivayanga from the Writers Helping Writers group on Facebook
Email marketing is an incredibly valuable and highly coveted asset in the digital age. Like I said, emails are worth more than oil, and while it’s hard to believe, it’s true and you can absolutely strike gold with your email marketing. An email is one of the most sacred spaces in the online world. It takes a lot of work to not only get into someone’s email inbox, but also to stay there and to get them to actually read your emails. It’s a personal way to connect with your audience and it’s one way you can be pretty certain your message will be read rather than scrolled past and forgotten like social media posts.
You should be nurturing and growing your subscriber list because it will ensure people are reading your content, following you and your work and ultimately supporting your business, buying your products, or booking your services. There is no best time to send emails, and like I said, you’ll notice your subscribers come from everywhere, which means multiple time zones. Pick a good time to send emails that’s practical and sustainable for you and send them out as often as it makes sense to do so for your goals and audience.
Examples Of Email Newsletters That Stand Out
Below is a few different examples of email newsletters I’m subscribed to that, in my opinion, don’t suck. These emails come from writers, editors, publishing industry professionals, content creators, and more! Links to the individual creators will be included in the “Further Reading” section at the end of this post.
Amy Landino’s Boss Notes Email Newsletters

A screenshot of Amy Landino’s Boss Notes email newsletter subject line. Photo by Payton Hayes.

A screenshot of Amy Landino’s Boss Notes email newsletter body 1. Photo by Payton Hayes.

A screenshot of Amy Landino’s Boss Notes email newsletter body 2. Photo by Payton Hayes.

A screenshot of Amy Landino’s Boss Notes email newsletter body 3. Photo by Payton Hayes.
Shayla Raquel’s Editorial Email Newsletters

A screenshot of Shayla Raquel’s editorial email newsletter subject line. Photo by Payton Hayes.

A screenshot of Shayla Raquel’s editorial email newsletter body 1. Photo by Payton Hayes.

A screenshot of Shayla Raquel’s editorial email newsletter body 2. Photo by Payton Hayes.
William Bernhardt’s Red Sneaker Writers Newsletter

A screenshot of William Bernhardt’s Red Sneaker Writers email newsletter issue 51, header and body 1. Photo by Payton Hayes.

A screenshot of William Bernhardt’s Red Sneaker Writers email newsletter issue 51, body 2. Photo by Payton Hayes.

A screenshot of William Bernhardt’s Red Sneaker Writers email newsletter issue 51, body 3. Photo by Payton Hayes.
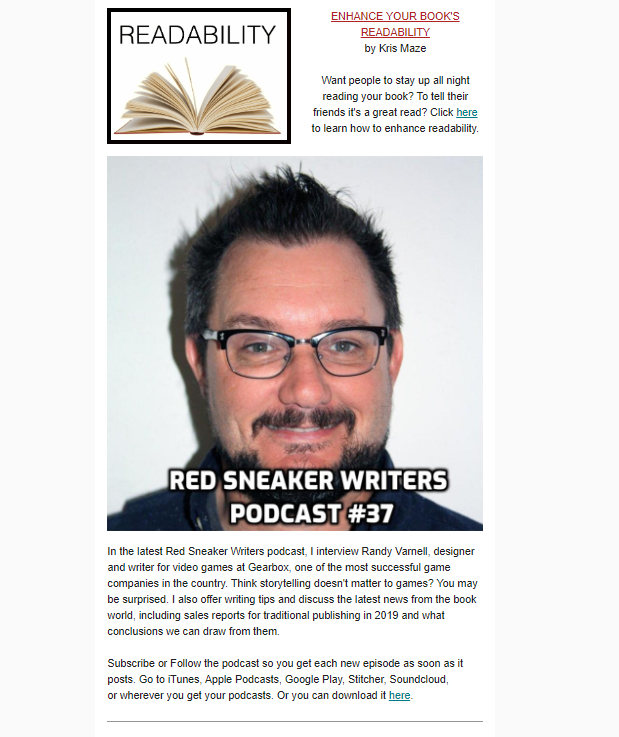
A screenshot of William Bernhardt’s Red Sneaker Writers email newsletter issue 51, body 4 and footer. Photo by Payton Hayes.
Email Newsletter Recap
At least cover the basics
Respect subscriber’s privacy. 🗸
Don’t spam subscribers. 🗸
Exercise professionalism with a personalized touch. 🗸
Be consistent. 🗸
Add value first, then call to action. 🗸
Don’t repost blog posts in the newsletter. 🗸
Go the extra mile:
Has a domain of their own. 🗸
Has a campaign manager. (Not manually sending out emails) 🗸
Enabled social sharing images. 🗸
Add click-to-tweet features to your newsletters. 🗸
Has set up autoresponders. 🗸
Created an opt-in page or cover/landing page. 🗸
Always deliver on promises. 🗸
Personalize and customize emails. 🗸
Use graphics, gifs, and emojis to grab attention. 🗸
Spend time on the headline. 🗸
Add a short bio, photo and/or signature. 🗸
Be a person first and a sale, second. 🗸
Don’t give people a reason to unsubscribe. 🗸
Segment your email newsletter list. 🗸
Add your socials. 🗸
Keep a close eye on un-subscribers and spam complaints. 🗸
Unsubscribe people who do not read your emails. 🗸
Don’t send an email more than two pages long. 🗸
And when in doubt, use the KISS method—keep it simple, sugar. 💋
All of the creators that I mentioned above consistently meet not only the basics, but the extra mile as well, in every single one of their newsletter emails. While it definitely takes some research and preparation up front, email marketing can be effective, profitable, and sustainable, but it doesn’t have to suck.
And that’s it for my 20 tips for newsletter marketing that don’t suck! Thank you to everyone who sent in questions for the Q&A section! If you made it this far into the post, I appreciate you for sticking around and reading it all! Have you heard of any of these tips before? Are there any other excellent tips that I might have missed? Will you use email marketing now that you’ve read this blog post? What aspects of email marketing do you love/hate as the sender or recipient? Which email marketing best practices are most effective in getting you to subscribe to a mailing list and actually read the sender’s emails? What email marketing faux-paus trigger you to unsubscribe the fastest? Let me know your thoughts in the comments at the end of this post!
Check out any of the resources or other creators I mentioned in this post in the Further Reading section below!
Bibliography
Cottonbro Studio (@cottonbro). “White Printer Paper on White Table.” Pexels photo, Feb 25, 2020 (Thumbnail photo).Hayes, Payton. “A screenshot of my social sharing image that pops up when my website URL is linked on other websites and social media platforms.” December 15, 2019.Hayes, Payton. “A screenshot of a section in my newsletter where readers could click a button that would take them to a landing page where they could download the freebie in various formats.” December 15, 2019.Hayes, Payton. “A screenshot of the greeting and body sections of my ‘Free Edit Giveaway’ email newsletter from 2019.” December 15, 2019.Hayes, Payton. “A screenshot of the body section of my ‘Free Edit Giveaway’ email newsletter from 2019.” December 15, 2019.Hayes, Payton. “A screenshot of the body and footer sections of my ‘Free Edit Giveaway’ email newsletter from 2019.” December 15, 2019.Hayes, Payton. “A screenshot of a landing page on my website where subscribers could download the freebie in various formats.” December 15, 2019.Hayes, Payton. “A screenshot showing how to personalize recipients’ names in emails when using Squarespace Email Campaigns.” December 15, 2019.Hayes, Payton. “A screenshot showing how to personalize recipients names in emails when using Mailchimp.” December 15, 2019.Hayes, Payton. “A screenshot of my email greeting default value, ‘Writerly Friend’ for subscribers that joined before my newsletter sign-up required full names.” December 15, 2019.Hayes, Payton. “A screenshot of my personalized email greeting, that addresses subscribers by their first and last names.” December 15, 2019.Hayes, Payton. “A screenshot of the end of my newsletter with my email signature image.” December 15, 2019.Hayes, Payton. “A screenshot of an email newsletter with almost five pages of blog post text copied into the body of the email.” December 15, 2019.Hayes Payton. “A screenshot of Mailchimp’s logo in the footer of their free plan option.” December 15, 2019.Hayes Payton. “A screenshot of Squarespace’s branding in the footer of plans starting at $14 and under.” December 15, 2019.Hayes, Payton. “A screenshot of the social links at the bottom of my emails.” December 15, 2019.Hayes, Payton. “A screenshot of the social links at the bottom of my website.” December 15, 2019.Hayes, Payton. “A screenshot of Amy Landino’s Boss Notes email newsletter subject line.” December 15, 2019.Hayes, Payton. “A screenshot of Amy Landino’s Boss Notes email newsletter body 1.” December 15, 2019.Hayes, Payton. “A screenshot of Amy Landino’s Boss Notes email newsletter body 2.” December 15, 2019.Hayes, Payton. “A screenshot of Amy Landino’s Boss Notes email newsletter body 3.” December 15, 2019.Hayes, Payton. “A screenshot of Shayla Raquel’s editorial email newsletter subject line.” December 15, 2019.Hayes, Payton. “A screenshot of Shayla Raquel’s editorial email newsletter body 1.” December 15, 2019.Hayes, Payton. “A screenshot of Shayla Raquel’s editorial email newsletter body 2.” December 15, 2019.Hayes, Payton. “A screenshot of William Bernhardt’s Red Sneaker Writers email newsletter issue 51, header and body 1.” December 15, 2019.Hayes, Payton. “A screenshot of William Bernhardt’s Red Sneaker Writers email newsletter issue 51, body 2.” December 15, 2019.Hayes, Payton. “A screenshot of William Bernhardt’s Red Sneaker Writers email newsletter issue 51, body 3.” December 15, 2019.Hayes, Payton. “A screenshot of William Bernhardt’s Red Sneaker Writers email newsletter issue 51, body 4 and footer.” December 15, 2019.
Further Reading
Click here to check out Shayla Raquel’s editorial blog and website.Click here to check out Amy Landino’s lifestyle and coaching website.Click here to check out Abbie Emmons’s author and writing advice website.Click here to check out Natalie Brenner’s lifestyle blog and website.Click here to connect with the Writers Helping Writers group on Facebook.Click here to connect with the Developmental Editor Connection group on Facebook.Click here to read Kevin Kelly’s essay, “1,000 True Fans” from The Technium, March 4, 2008.Click here to read Tim Stoddart’s article “How To Write A Headline That Drives More Clicks” Copyblogger, March 8, 2024.Click here to read Brian Clark’s article “22 Sure-Fire Headline Formulas that Work” from Copyblogger.com, March 23, 2021.Click here to read Sonia Simone’s article “10 Emotion-Based Headlines that Work” from Copyblogger.com, November 16, 2020.Click here to read Ruben Ramirez’s article “Advantages of Vector Graphics” Selfmadedesigner.com, accessed March 19, 2025.Click here to view The Chicago Graham School’s Chicago Manual of Style 17th ed. Christmas ornament printable.Click here to view The Chicago Graham School’s Chicago Manual of Style 18th ed. Christmas ornament printable.Click here to compare Canva’s pricing and plan features.Click here to compare Mailchimp’s pricing and plan features.Click here to visit Mailchimp’s guide to setting up Automation.Click here to visit Mailchimp’s guide to social cards.Click here to visit Mailchimp’s guide “All the Merge Tags Cheat Sheet.”Click here to compare Squarespace’s pricing and plan features.Click here to visit Squarespace’s guide to setting up Autoresponders.Click here to visit Squarespace’s guide to social sharing images.Click here to visit Squarespace’s email marketing templates.Click here to visit Squarespace’s guide to newsletter blocks.
Related Topics
Find Your Exact Genre, Find Your Lifelong Book Ambassadors by Shayla RaquelHow To Submit Your Writing To—And Get It Published In—Literary JournalsBook Marketing 101: Everything Writers Need To Know About Literary Agents and Querying15 Misconceptions About FreelancingThe Importance of Befriending Your Competition8 Reasons Why Having Writing Community Matters5 Healthy Habits For Every WriterWriting Exercises from Jeff Tweedy's Book, How To Write One Song“Twenty Little Poetry Projects” Writing Exercise by Jim SimmermanHow To Write Poems With Artificial Intelligence (Using Google's Verse by Verse)
Recent Blog Posts
This blog post was researched, written, and published by a human author without the assistance of generative artificial intelligence (gen-AI). Gen-AI models are trained on text written by humans, therefore, the presence of specific punctuation, verbiage, tone, or predictable, marketing-style phrases alone are not sufficient indicators of gen-AI usage. I implore readers to use context clues, critical thinking, pattern recognition, research, and employ their best judgement when determining the validity of human authorship of print and digital media today. If you want to learn more about my stance on gen-AI and it’s role in media and the publishing industry, I plan to release a blog post on this topic very soon, so stay tuned for that. This disclaimer will be updated once that post goes live. In the meantime, I will continue to be transparent about which tools and resources I use in my work.

Get Things Done With The Pomodoro Technique
25 Minutes On, 5 Minutes Off, 4 Times—It’s That Easy. When I first learned about the Pomodoro Technique, I probably thought the same thing as you—the Pomodoro what now? But as I learned more about it, it became an incredibly useful tool in writing projects.
This blog post was written by a human.Hi readers and writerly friends!
25 Minutes On, 5 Minutes Off, 4 Times—It’s That Easy.
When I first learned about the Pomodoro Technique, I probably thought the same thing as you—the Pomodoro what now? But as I learned more about it, it became an incredibly useful tool in writing projects.
What is the Pomodoro technique?
The Pomodoro Technique is time management method first developed by Francesco Cirillo in the late 1980’s. The technique employs a timer to break large workloads into intervals at 25 minutes in length separated by five-minute breaks. Each interval is called a pomodoro, or the Italian word for tomato. Francesco Cirillo used the word pomodoro because it was the name of the kitchen times he used as university student.
How does it work?
When you sit down to work, you set a time for 25 minutes and work as diligently as possible for that amount of time. When the timer goes off, you take a quick five minute break and then repeat the process four times. When you’ve completed your fourth pomodoro, you take a thirty minute break.
Why does it work so well?
This process has grown in popularity, especially in entrepreneurial circles, and that’s because it works. You wouldn’t expect something so simple and easy to implement to be so effective, but it really is. The reason is because by breaking your workload into smaller parts, you make bigger tasks seem less daunting. If you only have to really focus for 25 minutes, you begin to challenge yourself to see what you can complete in that time frame.
Using the Pomodoro technique for writing everyday
I don’t usually use this time management method in my editing projects because breaking my reading concentration slows me down, but I love using it when writing. Especially when combined with NaNoWriMo, the pomodoro technique is insanely useful for getting writing done. Often, sitting down to write a blog post such as this or work on my manuscript is still a daunting task for me, but by breaking it up into a measly 25 minutes of work, I know I can accomplish a lot more because by breaking it down, I am also removing the dread that comes with knowing I have to write so much.
I usually complete my blog posts in a much shorter amount of time because I work so diligently within my allotted 25 minutes, and when the times goes off before I’m finished, I take a break and I’m ready to jump back in and pick up where I left off, usually finishing up not too long after the break.
And that’s it for my how-to-guide for the Pomodoro Technique! Have you ever heard of this method of timekeeping? What do you think? Let me know in the comments below!
Bibliography
Related Topics
How To Organize Your Digital Life: 5 Tips For Staying Organized as a Writer or Freelancer5 MORE Ways to Stay Organized as a Writer or FreelancerGet Things Done With The Pomodoro Technique5 Reasons Most Writers QuitWhen Writing Becomes DifficultSelf-Care Tips for Readers and Writers5 Healthy Habits For Every Writer8 Ways To Level Up Your Workspace And Elevate Your ProductivityThe 4 Most Useful FREE Apps for Writers in 2022 (Sync Across Multiple Devices, Not Only iOS)20 Tips and Tricks for Email Newsletters That Don't SuckView my FAQ page for inspiration for your own!
Recent Blog Posts
This blog post was researched, written, and published by a human author without the assistance of generative artificial intelligence (gen-AI). Gen-AI models are trained on text written by humans, therefore, the presence of specific punctuation, verbiage, tone, or predictable, marketing-style phrases alone are not sufficient indicators of gen-AI usage. I implore readers to use context clues, critical thinking, pattern recognition, research, and employ their best judgement when determining the validity of human authorship of print and digital media today. If you want to learn more about my stance on gen-AI and it’s role in media and the publishing industry, I plan to release a blog post on this topic very soon, so stay tuned for that. This disclaimer will be updated once that post goes live. In the meantime, I will continue to be transparent about which tools and resources I use in my work.

Oversaturation In A World of Overconsumption (There's No Such Thing)
In today's digital age, the notion of market oversaturation is challenged by the rapid consumption of media content. Consumers eagerly await new material from their favorite creators, often consuming content faster than it can be produced. This high demand indicates that opportunities abound for new creators to enter the scene. As Gary Vee noted in Matt D’Avella’s podcast, the fragmentation of attention across various platforms prevents overexposure. Therefore, aspiring content creators should recognize that the ever-growing appetite for fresh content diminishes the concept of oversaturation, making it an opportune time to share their unique voices.

Laptop displaying site analytics. Photo by
Carlos Muza.
This blog post was written by a human.Hello readers and writerly friends!
If you’re a returning reader, welcome back and if you’re new to the blog, thanks for stopping by! In this blog post we’re discussing oversaturation in the digital era, especially as it relates to content creation and social media. If you’re a writer, artist, entrepreneur, or content creator, you may have heard someone utter this quote before, or maybe you’ve even said it yourself: “The market is over-saturated.”
This statement has been discussed widely in many entrepreneur circles and how its a major roadblock in many people’s road to success. However, its just not true. Yes, the idea of over-saturation is a roadblock, but over-saturation doesn’t really exist, especially not in the digital era where over-consumption of media is a prominent part of society.
One great example of this is easily found in your own YouTube subscriptions. Most, if not, all of us have been in the scenario where we’re left waiting for our favorite YouTube creator to come out with a new video. If they stick to a regular posting schedule, then we know when to expect to see their videos out, but it doesn’t mean that in the meantime, we’re not eager for those notifications. This is also true for other social media platforms, primarily Twitter and Instagram.
Here’s the tea. There’s no such thing as over-saturation in a world where viewers and subscribers are consuming content faster than it is being created. Creators often describe the process for videos, podcasts and even blog posts such as this and the behind-the-scenes work that goes into crafting content that will only be viewed for a few short moments. It’s hard to think about pouring all of that time and energy into a project that might not even capture someone’s attention for more than a few seconds.
This isn’t entirely a bad thing, though. While it can be a challenge to create compelling content that will engage an audience in a world filled with hand-held distractions, it can also be an advantage. In this digital age, people are consuming content faster than ever. It only takes a few minutes to watch a YouTube video and even less time to read a new Twitter post, which means that consumers are devouring content so rapidly, that the demand for new content is at an all time high. If you’re going to start your YouTube channel or your motivational podcast, there’s no better time than now, to do it. Social media markets may seem over-saturated due to the vast amount of creators posting on platforms, but this industry is still in its infancy. Over-Saturation doesn’t exist.
Gary Vee even supported this argument on Matt D’Avella’s podcast, the Ground Up Show, episode 101. when he said, “…fragmentation of attention across all of these mediums has created a scenario where you can't have overexposure.” (D’Avella)
Let me know what you thought about this hot take on oversaturation! Do you think this is an issue that poses a real threat to influencers and content creators or is it more of a non-issue? Why? What do you think? Let me know in the comments below!
Bibliography
Muza, Carlos. "Laptop displaying site analytics." Unsplash photo, April 17, 2016. Accessed April 2, 2019.D’Avella, Matt. “Episode 101” The Ground Up Show. Access April 2, 2019.
Further Reading
The Ground Up Show is now defunct and has been replaced with The Three Rules PodcastCheck out episode 101 of The Ground Up Show by Matt D’Avella ft. Gary Vaynerchuck
Related Topics
Find Your Exact Genre, Find Your Lifelong Book Ambassadors by Shayla RaquelHow To Submit Your Writing To—And Get It Published In—Literary JournalsFor Content Creators and CEOs with ADHD: Strategies to Succeed Despite Overwhelm and Distractions8 Ways To Level Up Your Workspace And Elevate Your Productivity5 MORE Ways To Stay Organized As A Writer Or FreelancerHow To Organize Your Digital Life: 5 Tips For Staying Organized As A Writer Or Freelancer15 Misconceptions About FreelancingThe Importance of Befriending Your Competition20 Tips and Tricks for Email Newsletters That Don't SuckFreelancing BasicsEditing Misconceptions: Book Editors Aren’t Monsters
Recent Blog Posts
This blog post was researched, written, and published by a human author without the assistance of generative artificial intelligence (gen-AI). Gen-AI models are trained on text written by humans, therefore, the presence of specific punctuation, verbiage, tone, or predictable, marketing-style phrases alone are not sufficient indicators of gen-AI usage. I implore readers to use context clues, critical thinking, pattern recognition, research, and employ their best judgement when determining the validity of human authorship of print and digital media today. If you want to learn more about my stance on gen-AI and it’s role in media and the publishing industry, I plan to release a blog post on this topic very soon, so stay tuned for that. This disclaimer will be updated once that post goes live. In the meantime, I will continue to be transparent about which tools and resources I use in my work.

Editing Misconceptions: Book Editors Aren’t Monsters
Editors are often perceived as overly critical individuals fixated on finding every possible error in a manuscript. However, this portrayal is misleading. Editors play a crucial role in refining a writer's work, offering constructive feedback to enhance clarity, coherence, and overall quality. Their goal is not to criticize but to collaborate with writers, helping them realize their vision and produce the best possible version of their work. Understanding this collaborative dynamic can alleviate apprehensions writers may have about the editing process and foster a more productive author-editor relationship.

Black eyeglasses beside a notebook and candle. Photo by Marissa Grootes.
This blog post was written by a human.Hello readers and writerly friends!
If you’re a returning reader, welcome back and if you’re new to the blog, thanks for stopping by! In this shorter blog post I’m explaining some of the most common misconceptions surrounding the world of manuscript editing. Many people tend to think of editors as the snobby grammar police with their red pens, monsters bent over their keyboards ravenously devouring manuscripts in search of every possible formatting or grammatical error.
Okay, maybe that’s not quite the image that comes to mind or everyone, but editors are often painted in a less-than-flattering light, because many aspiring authors just don’t know how to take constructive criticism. However, these depictions are just simply not true. I was a writer before I ever became an editor, so I am distinctly aware of how hard it can be to share your work. It’s your passion project, your lifelong dream—your book baby. It’s precious to you, and the idea that you’d entrust it to someone else’s eyes is nearly unthinkable. It’s also brave and an essential step in the writing process and your growth as a writer.
Editors are not in the biz to tear your manuscript and your dreams to shreds. Yes, there might be some uncomfortable things that need to be addressed in the process of editing your manuscript, but editors aren’t here to just shoot you down, they’re here to help you.
Think of it this way, for an effective editorial process, writers must view their editors as their partners. Editors are like those friends that tell you about the lipstick on your teeth rather than letting you walk around with a red smudge on your pearly whites all day. Those friends are looking out for your best interests and your editor is doing the same for you and your writing.
You may not always want to hear the comments editors make, but ultimately, we’re here to help you. We want to see you succeed. We want you to be able to connect with your readers. We want to watch a beautiful creation emerge and to see your passion project come to fruition.
Editors are often perceived as overly critical individuals fixated on finding every possible error in a manuscript. However, this portrayal is misleading. Editors play a crucial role in refining a writer's work, offering constructive feedback to enhance clarity, coherence, and overall quality. Their goal is not to criticize but to collaborate with writers, helping them realize their vision and produce the best possible version of their work. Understanding this collaborative dynamic can alleviate apprehensions writers may have about the editing process and foster a more productive author-editor relationship.
What did you think about this hot take on editors? Do you agree or disagree? Let me know in the comments below!
Bibliography
Related Topics
Freelancing Basics15 Misconceptions About FreelancingThe Importance of Befriending Your Competition20 Tips and Tricks for Email Newsletters That Don't SuckOversaturation In A World of Overconsumption (There's No Such Thing)4 Of The Most Useful FREE Apps For WritersFor Content Creators and CEOs with ADHD: Strategies to Succeed Despite Overwhelm and Distractions8 Ways To Level Up Your Workspace And Elevate Your Productivity5 MORE Ways To Stay Organized As A Writer Or FreelancerHow To Organize Your Digital Life: 5 Tips For Staying Organized As A Writer Or Freelancer
Recent Blog Posts
This blog post was researched, written, and published by a human author without the assistance of generative artificial intelligence (gen-AI). Gen-AI models are trained on text written by humans, therefore, the presence of specific punctuation, verbiage, tone, or predictable, marketing-style phrases alone are not sufficient indicators of gen-AI usage. I implore readers to use context clues, critical thinking, pattern recognition, research, and employ their best judgement when determining the validity of human authorship of print and digital media today. If you want to learn more about my stance on gen-AI and it’s role in media and the publishing industry, I plan to release a blog post on this topic very soon, so stay tuned for that. This disclaimer will be updated once that post goes live. In the meantime, I will continue to be transparent about which tools and resources I use in my work.

Freelancing Basics
Embarking on a freelance editing career requires strategic preparation and continuous development. Aspiring editors should seek internships during or after their studies to gain practical experience with industry-standard tools and techniques. Pursuing specialized courses in various editing facets, grammar, and the Chicago Manual of Style (CMOS) is essential, as is obtaining relevant certifications to validate one's expertise. Joining editorial associations can facilitate networking and provide valuable resources. A commitment to extensive reading—including industry literature, style guides, and genre-specific novels—enhances critical thinking and editorial skills. To secure clients, collaborating with fellow editors, connecting with literary agents, and offering services both online and within local communities are effective strategies. Specializing in specific editing types allows for skill refinement and niche expertise. Efficient time management, such as batching similar tasks, is crucial for productivity. Maintaining a steady workflow involves continually seeking new projects to mitigate potential lulls. Additionally, setting realistic working hours and establishing boundaries ensures a sustainable work-life balance.
This blog post was written by a human.Hello readers and writerly friends!
If you’re a returning reader, welcome back and if you’re new to the blog, thanks for stopping by! In this blog post we’re discussing what it takes to get started as a freelance editor in the publishing industry. Freelance editing can be just as rewarding and fulfilling as editing for a traditional publisher, but likewise, it can be just as difficult getting started. I’ve put together a few lists to help you get started with your freelance editing business. If you’re not into freelance editing, that’s okay! Many of these tips can be applied to freelancers in other industries!
Getting started as a freelance publishing professional
These tips are specifically for freelance editors (hello—speaking from experience here!) but feel free to tweak each bullet point as needed, to fit your industry and niche.
Apply to internships while still in school and even after, to build your real-world experience in the industry, as well as your experience working with industry-standard programs and editing techniques.
Take masterclasses specializing in the different degrees of manuscript editing, grammar, and the Chicago Manual of Style (CMOS.)
Aim for editing certifications to show your education and qualifications.
Join editorial associations to build connections with other editors in these networks and build your repertoire of resources in the editing industry.
Read all the books you can—on industry, writing, style and everything in between. Seriously. (And novels in your specific genre too, of course!) I have an ever-growing list of my favorite craft books. These are so helpful, not only for becoming more familiar with the editorial industry, but they will help you read and think more critically as an editor as well. I’ve linked some resources in the Further Reading section at the end of this post!

Notebook next to black eyeglasses and a cup of pens. Photo by Suzy Hazelwood
Finding work as a freelance professional
Collaborate with other editors online and in-person to gain new perspectives, techniques and successful practices of others.
Connect with literary agents and other editors for their “reject” clients to build experience and make connections with artists who are just getting started. (reject clients may include clients the other editors and agents simply didn’t vibe with our didn’t have time to take on the projects of and does not necessarily;y refer to clients that are incompetent or lacking.)
Offer services both online and in your community to increase your experience.
Apply to any business or person with an online presence. Writing online copy is just as important as manuscript editing, especially in the digital age.
Specialize. Don’t try to do everything when you’re just starting out. Try a couple of different types of editing to see what you like and stick with that for a while. You’ll hone your skills and be more experienced in that niche.

Brown suede couch draped in leopard print throw blankets. Photo by Erik Mclean
Working from home as a freelancer
Time batch similar tasks. Freelance Editor, Mollie Turbeville, from Molliereads on YouTube, and bestselling author, award-winning speaker and entrepreneur, Amy Landino are both uber-successful boss ladies, living their best lives and managing their time with time-batching. The key to this is to schedule similar events and tasks on the same days, to eliminate wasted time. One way they use this practice is on days when they film for their channels, they will film several videos in one day while their “film-ready” or they’ll schedule several meetups in one day at the same coffee shop to cut down on time spent getting ready and travelling.
Keep looking for work. While your schedule may dance between being busy and slow work days, it’s important to keep multiple projects lined up. In this industry, its best to prepare for situations out of our control, such as when a writer backs out of a project.
Plan realistic hours for your work. It’s important to keep busy, but it is likewise important to create a meaningful and sustainable schedule for yourself. As an editor, burnout comes more often and destructive than for other occupations. Similarly, it is important to remember that when it is time to work, you must be responsible for yourself and your time. Editors cannot wait for motivation or creativity to strike because most projects are time-sensitive. Set realistic hours and stick to your schedule.
Create a workspace conducive to successful business practice. Environment is everything for freelance editors. For the same reason it is important that students don’t sleep where the study or study where they sleep, freelancers need a workspace that can be differentiated from their home environment. In the student example, it’s easy to see where the mental lines become blurred if one studies in their bed. This has been proven to decrease study effectiveness and degrade students ability to stay on task and alert in an area they associate with sleep. Similar to this example, freelances must be able to separate work life and home life to avoid burnout and to avoid blurring the lines between work and play. This may mean implementing a physical distinction, such as a divider or even setting up a home office separate from sources of entertainment. This distinction should make it so that when you’re in your workspace, you aren’t distracted or tempted to procrastinate and when you’re in your home, you don’t feel the pressure of work when it’s time to wind down.
Bibliography
Sikkema, Kelly (@kellysikkema). “White printer paper on brown wooden table.” Unsplash, September 1, 2020 (Thumbnail photo).Hazelwood, Suzy (@suzyhazelwood). “Close-up photography of notebook near pens.” Pexels photo, June 6, 2018.Mclean, Erik (@introspectivedsgn). “Deer painting over brown fabric sofa with reading torchiere on corner.” Unsplash photo, March 28, 2019.
Further Reading
Payton’s Picks (20+ books on writing, editing, marketing, and publishing books, publishing industry insiders, and freelancing tips)How To Organize Your Digital Life: 5 Tips For Staying Organized As A Writer Or Freelancer5 MORE Ways To Stay Organized As A Writer Or Freelancer
Related Topics
The Importance of Befriending Your Competition20 Tips and Tricks for Email Newsletters That Don't SuckOversaturation In A World of Overconsumption (There's No Such Thing)Editing Misconceptions: Editors Aren’t Monsters4 Of The Most Useful FREE Apps For WritersFor Content Creators and CEOs with ADHD: Strategies to Succeed Despite Overwhelm and Distractions8 Ways To Level Up Your Workspace And Elevate Your Productivity
Recent Blog Posts
This blog post was researched, written, and published by a human author without the assistance of generative artificial intelligence (gen-AI). Gen-AI models are trained on text written by humans, therefore, the presence of specific punctuation, verbiage, tone, or predictable, marketing-style phrases alone are not sufficient indicators of gen-AI usage. I implore readers to use context clues, critical thinking, pattern recognition, research, and employ their best judgement when determining the validity of human authorship of print and digital media today. If you want to learn more about my stance on gen-AI and it’s role in media and the publishing industry, I plan to release a blog post on this topic very soon, so stay tuned for that. This disclaimer will be updated once that post goes live. In the meantime, I will continue to be transparent about which tools and resources I use in my work.